System Settings – General
This section allows you to configure basic information about your website, including site title, icon, language, timezone, and date/time formats.
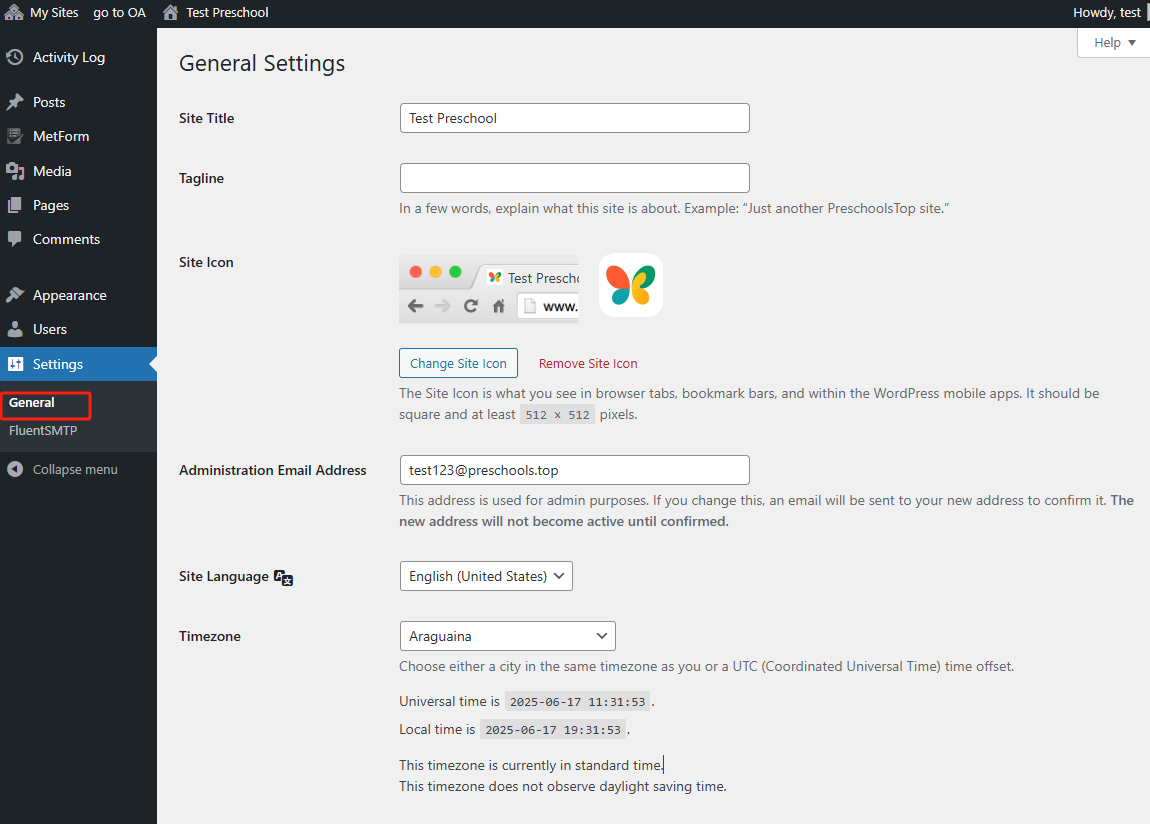
1. 🏷️ Edit Basic Site Information
Go to 【Settings】 > 【General】 to update the following:
- Site Title: This is the name of your website, shown in the browser tab and various places across WordPress.
- Tagline: A short description or slogan for your site. (Optional)
- Site Icon: Also known as a favicon, this image appears in browser tabs and mobile bookmarks. Click 【Change Site Icon】 to upload an image. Recommended size is at least 512×512 pixels.
2. 📧 Set Administrator Email Address
- Administration Email Address: This email is used for admin notifications. When updated, a confirmation email will be sent to the new address. Note: The change won’t take effect until the new email is confirmed.
3. 🌐 Site Language and Timezone
-
Site Language: Set the language for the WordPress admin interface. For most U.S. users, the default is English (United States).
-
Timezone: Select a timezone based on your location (e.g., Araguaina). The system will automatically adjust time displays accordingly.
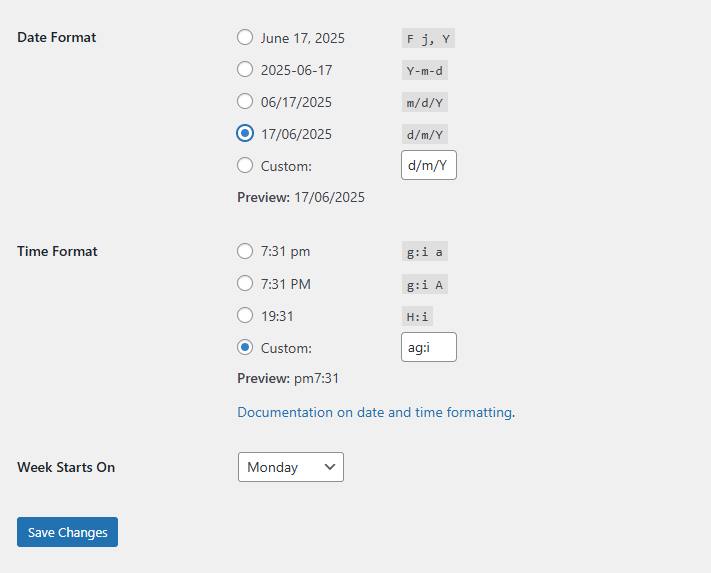
4. 🗓️ Configure Date and Time Format
You can customize how dates and times appear on your website:
- Date Format: Choose from preset formats (e.g.,
2025-06-17,17/06/2025) or enter a custom format. - Time Format: Supports both 12-hour and 24-hour formats. You may also enter a custom format (e.g.,
a g:ito display time aspm7:31). - Week Starts On: Choose the day your calendar week begins. Default is Monday.
After making changes, be sure to click the 【Save Changes】 button at the bottom of the page.
📧 Email Configuration (FluentSMTP)
FluentSMTP is used to configure your website’s email sending function, ensuring that system notifications (e.g., enrollment approvals, password resets) are reliably delivered.

1. Open FluentSMTP Settings
- Navigate to the left sidebar and click 【Settings】 > 【FluentSMTP】.
- On the main screen, select your preferred Email Service Provider (e.g., Gmail, Amazon SES, SendGrid, Other SMTP, etc.).
2. Fill in Sender Settings
In the Sender Settings section:
- From Email: Enter the email address you want to use for sending messages (e.g.,
noreply@yourdomain.com). - From Name: This name will appear as the sender name in recipients' inboxes.
- Keep both checkboxes checked:
- ✅ Force From Email (Recommended)
- ✅ Set the return-path to match the From Email
3. Configure SMTP Details
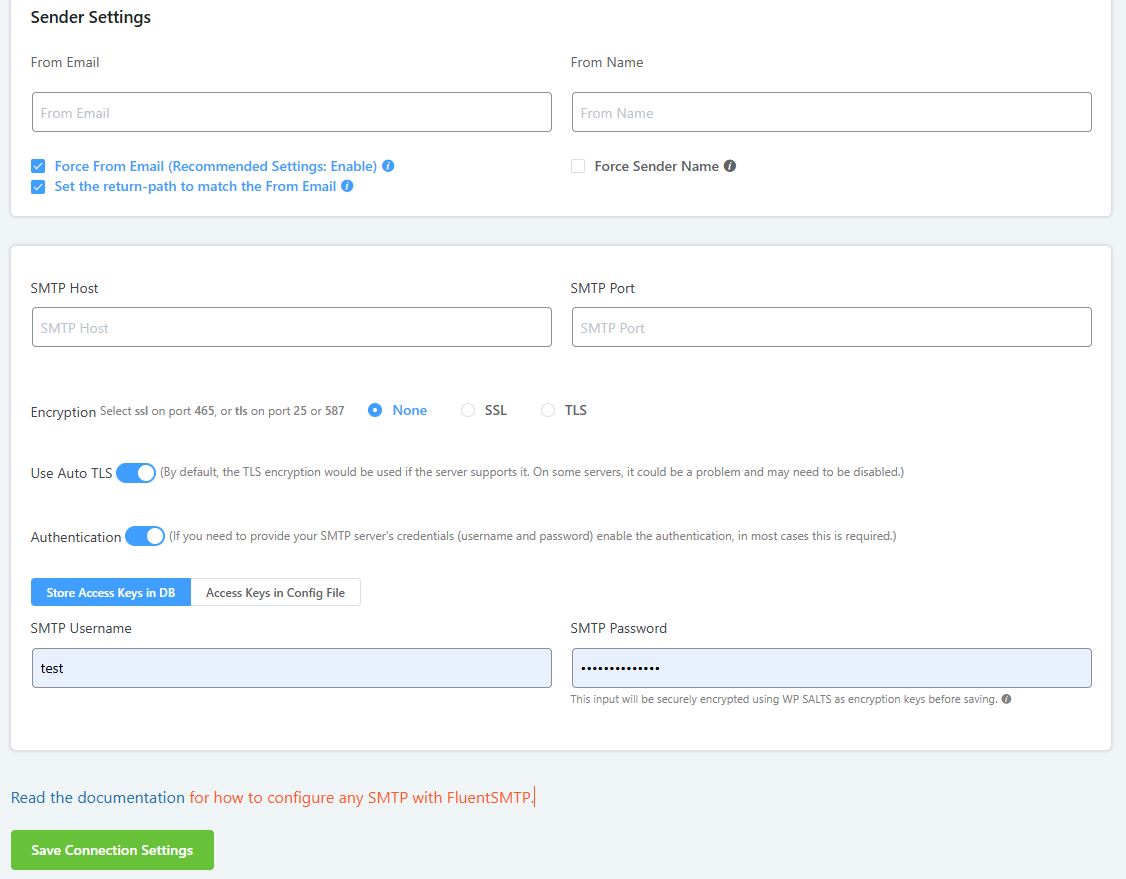
Scroll down to the SMTP Settings section and fill in:
- SMTP Host: Your mail server address (e.g.,
smtp.gmail.com). - SMTP Port: Usually
587for TLS,465for SSL, or25for no encryption. - Encryption: Choose
SSL,TLS, orNonebased on your provider. - Auto TLS: Leave it enabled unless your provider requires otherwise.
- Authentication: Enable it to enter your credentials:
- SMTP Username: Your email username.
- SMTP Password: Your email password (will be encrypted).
4. Save Your Settings
Click the green 【Save Connection Settings】 button at the bottom to apply your configuration.
ℹ️ Need Help?
If you are not sure how to configure your email settings, please contact our support team at 📮 support@preschool.zone – we’re happy to help you get it set up correctly.