Prerequisites
-
The client must use a browser based on the Google Chrome engine. Regardless of whether the user's device is a mobile phone, tablet, or computer, a Chrome-based browser is required. Using other browsers may lead to issues.
-
During use, system-pushed messages require the user to authorize browser subscription. Please agree and authorize the subscription to avoid missing notifications.
-
Before official use, please prepare employee data, as well as data for children and parents. These need to be imported into the system. For import instructions, refer to the [User & Roles Module].
-
The payment function requires PayPal activation before use.
-
For other issues, please contact support@preschool.zone
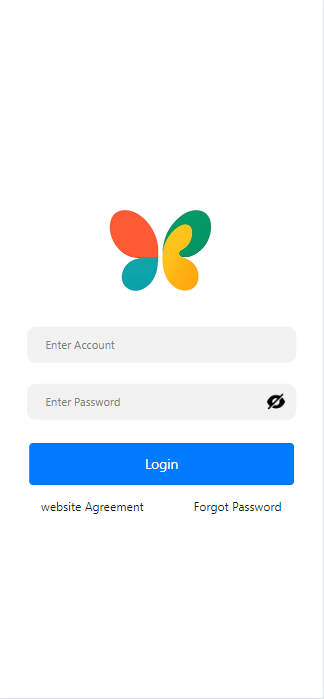
User Login
- The user
opensthe login page entryhttps://h5.preschool.zone/, enters the phone number and password to log in.
Note: a. Check that Caps Lock is off when typing your password. b. The system does not provide an external registration function. The kindergarten needs to input the phone numbers of parents and staff into the system in advance.
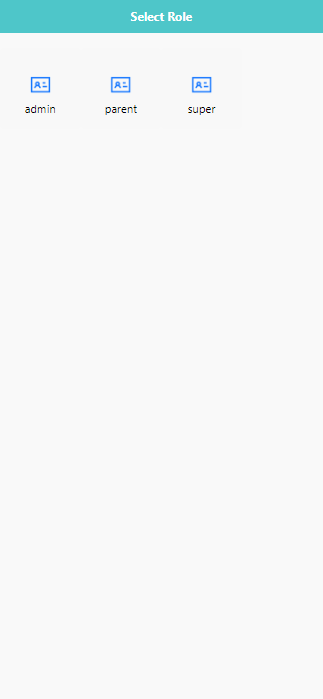
- After logging in, you need to choose the corresponding role, such as [admin], [parent], [teacher], etc. Different roles have different permissions for functionalities. To grant permissions for a role, you can go to [User & Role] under [Permission Control] for management.
3.For security reasons, avoid logging in on public devices. If you're having trouble logging in, check your internet connection or try resetting your password.
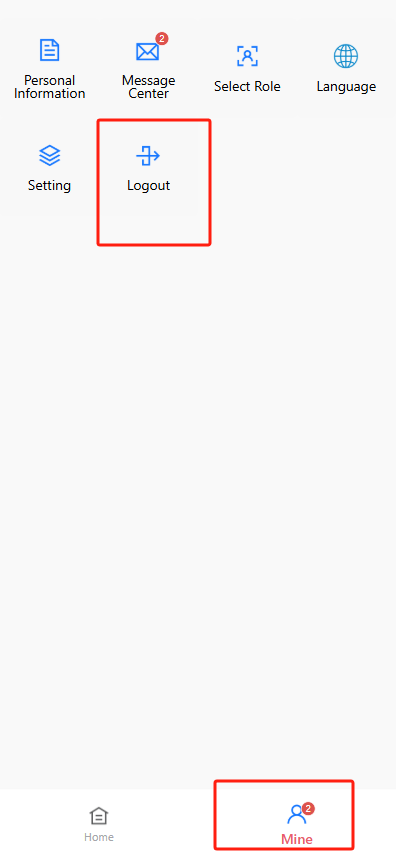
🔓 Logging Out
To securely sign out of your account:
- Tap the 【Mine】 tab at the bottom of the screen.
- Select the 【Logout】 button from the menu.
- The system will immediately log you out and return to the login screen.
Tip: Logging out is recommended after each session, especially on shared or public devices.
Forgot Password
-
If the user has forgotten the login password, they can reset it using the following method.
-
Clickon [Forgot Password].
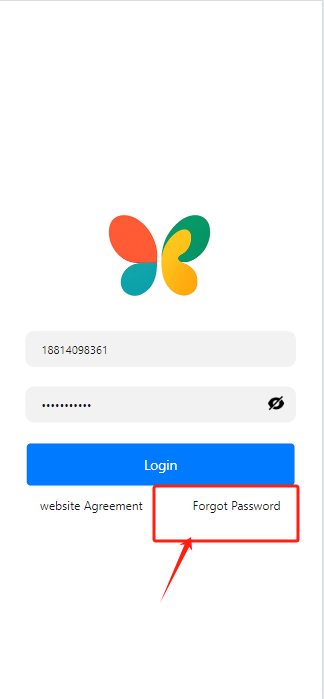
- After entering the user form information, click [get code]. If the password is being reset via phone number, a SMS verification code will be sent. If the password is being reset via email, check the spam folder in case the email is filtered.
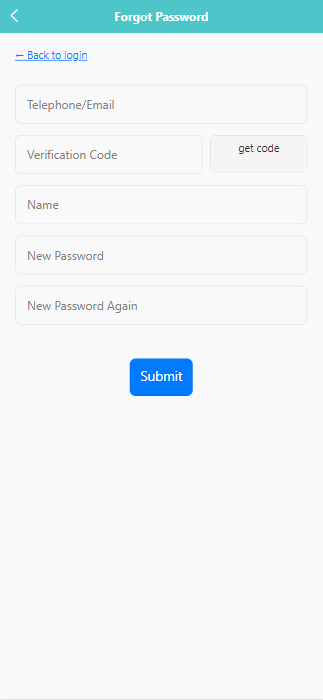
- Click [Submit] to submit the changes.
Homepage
After the user logs in, as shown below.
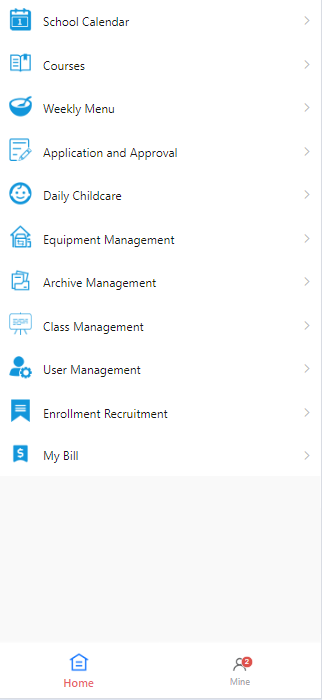
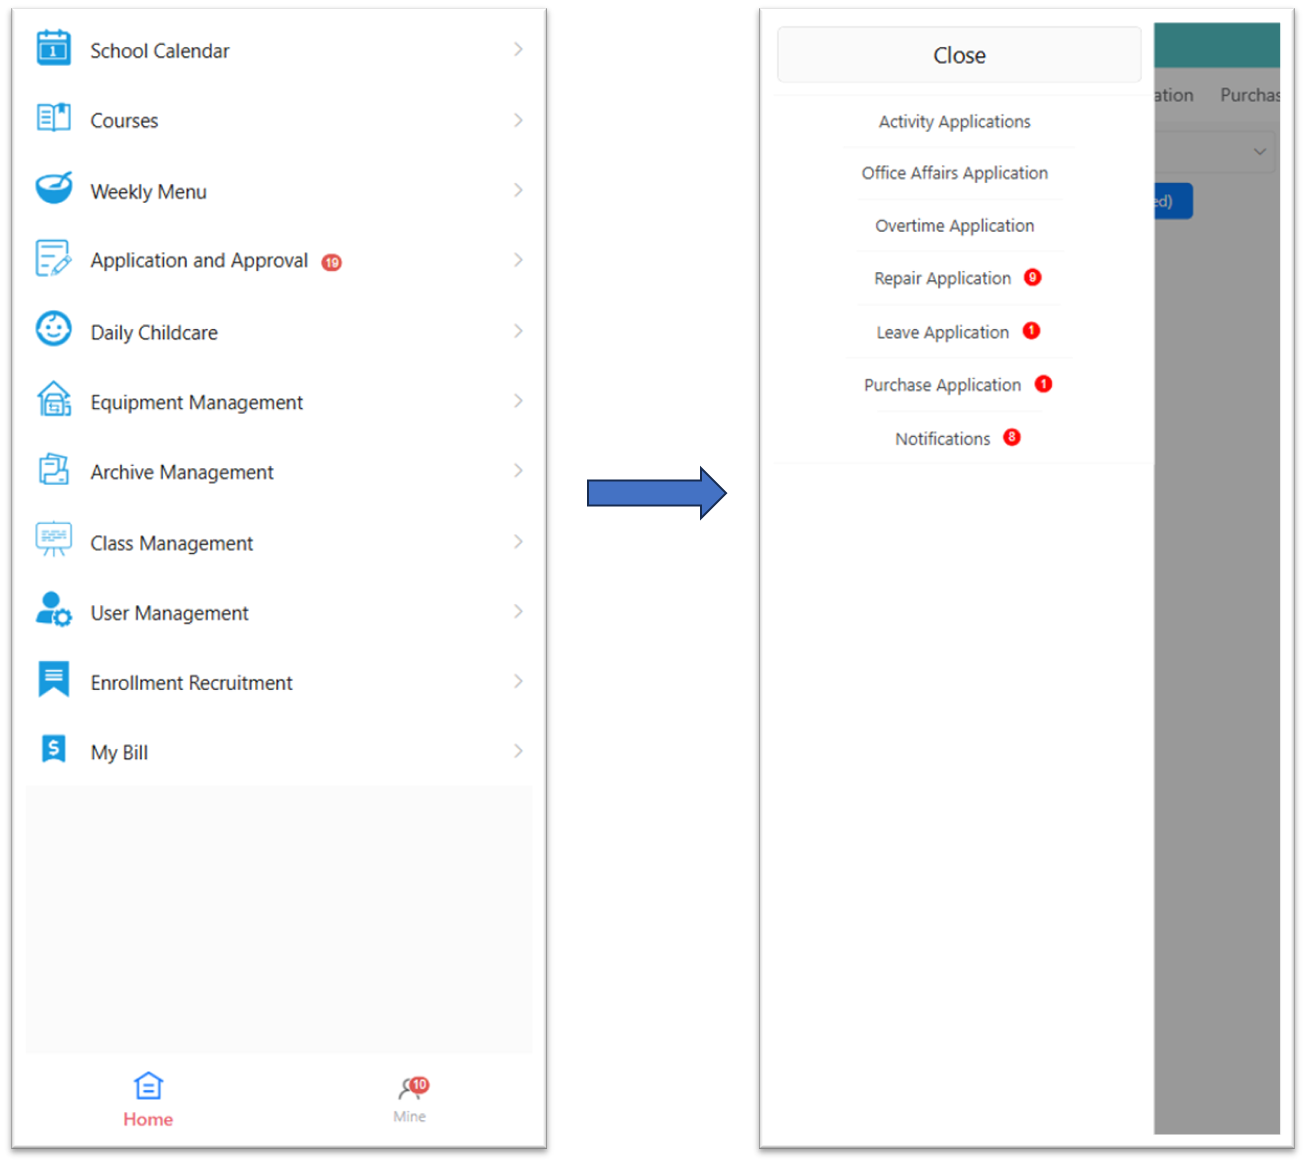
After logging in, you'll see the main navigation menu. Each item gives you access to a key feature of the system. Here's a quick overview of what each section does:
1.School Calendar
View and manage important school dates, holidays, and activity schedules.
2.Courses
Set up, organize, and manage class subjects, lesson content, and teaching plans.
3.Weekly Menu
Create and manage weekly food menus for children, including breakfast, lunch, and snacks.
4.Application and Approval
Track and process internal requests and approvals—such as time-off applications, supply purchases, etc.
5.Daily Childcare
Record daily attendance, naps, meals, and health checks for each child.
6.Equipment Management
Manage classroom and facility resources—track usage, condition, and inventory.
7.Archive Management
Securely store and access documents related to staff members only, such as contracts, certifications, and HR files.
8.Class Management
Organize classes, assign teachers, and monitor children enrolled in each class.
9.User Management
Add and manage user accounts for staff, teachers, and administrators. Set permissions and roles.
10.Enrollment Recruitment
Manage leads and applications from prospective families. Track recruitment status and communication.
11.My Bill
View your institution’s billing details, payment history, and outstanding balances.
School Calendar Module
The School Calendar lets staff members view, add, and manage important events such as holidays, training sessions, and school-wide activities.

🔍 Viewing Events
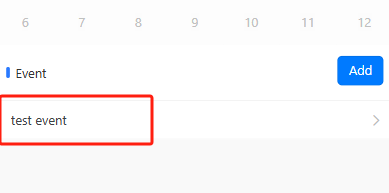
Days with scheduled events are marked with a colored dot (•) and the number of events.
Tap a date to see a list of events scheduled for that day at the bottom of the screen.
➕ Adding a New Event
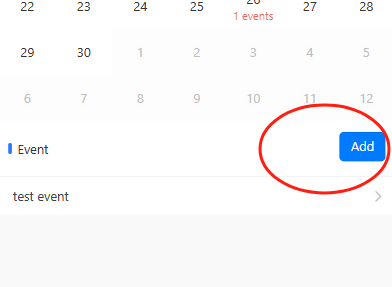
Tap the Add button on the lower-right corner.
In the pop-up window, enter the event name or details.
Tap OK to save, or Cancel to exit without saving.
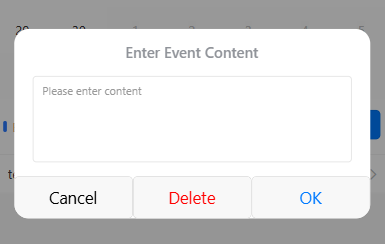
🖊️ Editing or Deleting an Event
Tap the event name from the list below the calendar (e.g., test event).
In the pop-up window, you can:
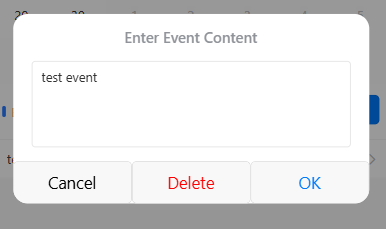
Modify the text and tap OK to update it.
Tap Delete to remove the event.
Tap Cancel to close without changes.
🔄 Navigating the Calendar
Use the left (◀) and right (▶) arrows at the top to move between months.
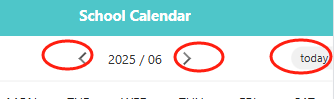
Tap Today in the upper-right corner to return to the current date.
Weekly Menu
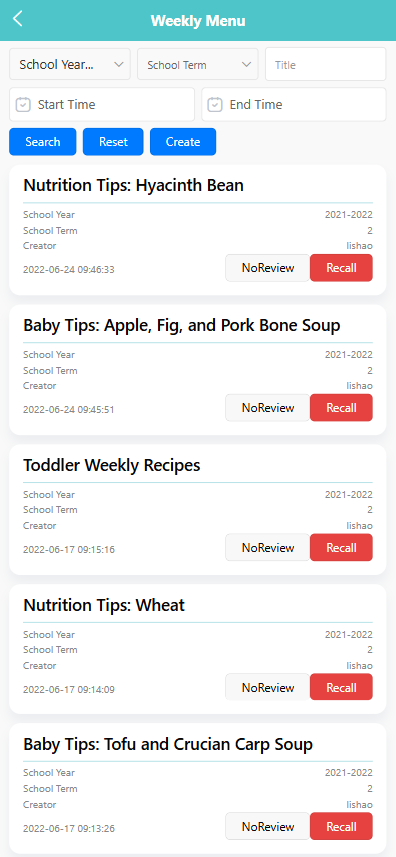
The Weekly Menu module allows staff to create and manage nutrition plans, baby tips, and food-related announcements for children. You can publish weekly menus, upload attachments, and track review or recall status.
🔍 Searching Weekly Menus
Use the filters at the top of the screen to find entries by:
- School Year
- School Term
- Title
- Start/End Time
Click Search to view results, or Reset to clear the filters.
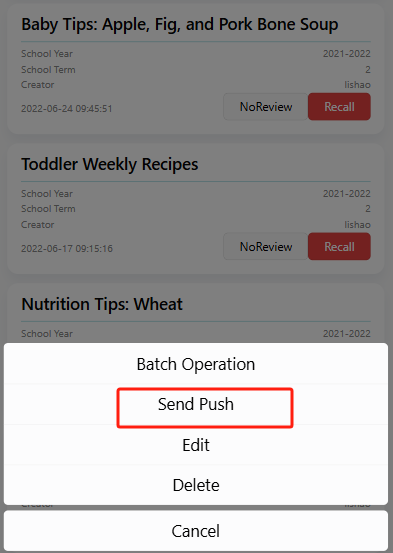
✏️ Managing Existing Entries
Long press any existing entry to open an action menu with the following options:
- Edit – modify the title, content, or attachments.
- Send Push – notify users about the entry via in-app message or alert.
- Delete – permanently remove the entry.
- Batch Operation – manage multiple entries at once (e.g., mass delete).
Recall button: Allows you to retract an entry for editing and resubmission.
1. Create Menu
Click [Create] to enter the menu creation page, as shown below.
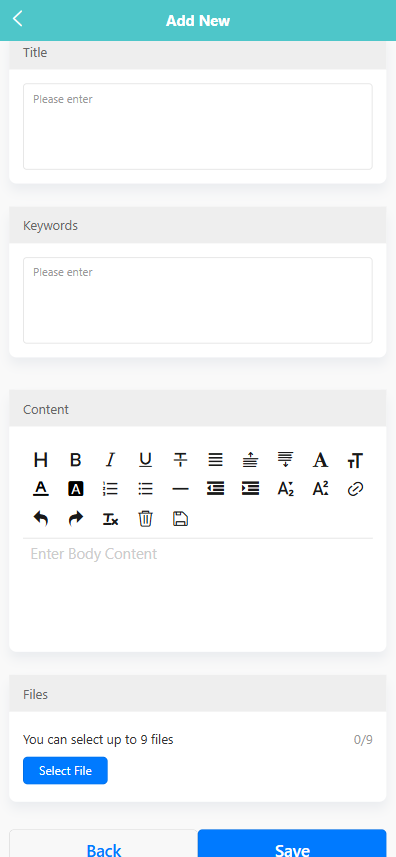
Title – e.g., “Nutrition Tips: Wheat”
Keywords – helpful for search (e.g., "Recipes")
Content – use the rich text editor to format your menu or tips.
Files – upload up to 9 images or documents (e.g., PDF menus, food photos).
After filling in, click [Save].
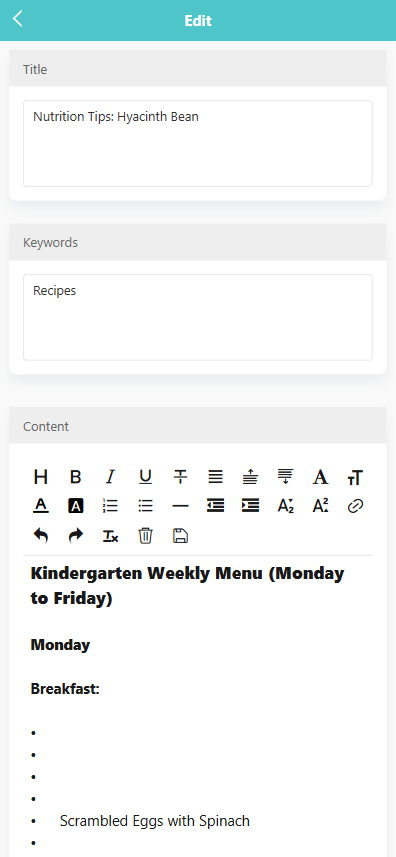
2. Edit Menu
Long press an item to open the action menu, then select 【Edit】to enter the edit page. After editing, click [Save].
3. Push Menu
After editing the menu, click [Send push] to notify everyone.
✅ System Prompts
You'll be asked to confirm key actions like:
- “Are you sure you want to push?” (before sending)
- “Are you sure you want to delete?” (before deleting)
- “Are you sure you want to retract and re-review?” (when recalling)
Notification&Message
✉️ Message Center
Tap the 【Message Center】 button on the 【Mine】 page to access your internal messages, kindergarten notifications, and system notifications. A red badge indicates the number of unread messages.
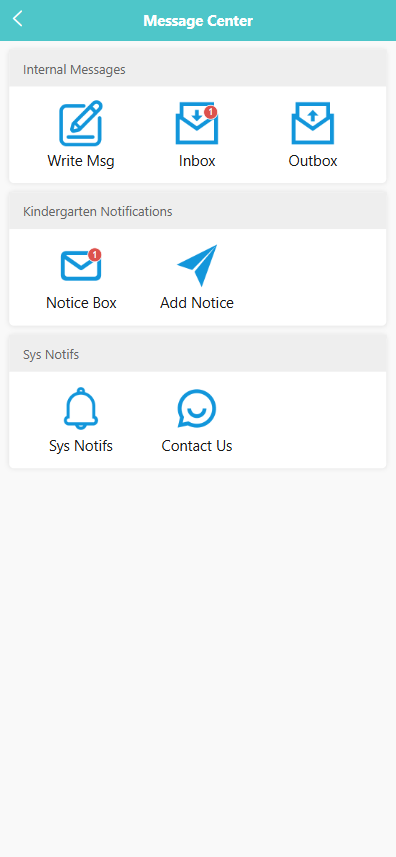
The 【Message Center】 contains the following three sections:
1. Internal Messages
This section includes three features: 【Write Msg】, 【Inbox】, and 【Outbox】.
Write Msg
Tap 【Write Msg】 to create and send a new internal message.
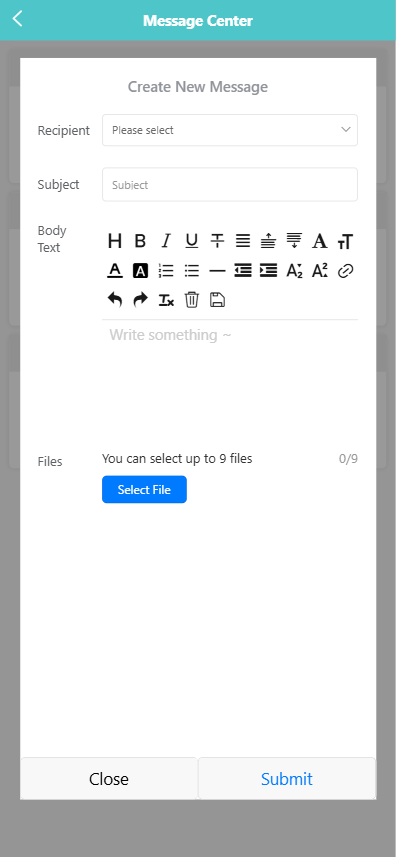
- Select a recipient from the dropdown menu.
- Enter the subject and body text.
- Use the formatting toolbar to style your message.
- Tap 【Select File】 to attach up to 9 files.
- Tap 【Submit】 to send the message, or 【Close】 to cancel.
Inbox
Tap 【Inbox】 to view received messages. Use the filter dropdown to switch between 【Unread】, 【Not Replied】, and 【Replied】 messages.
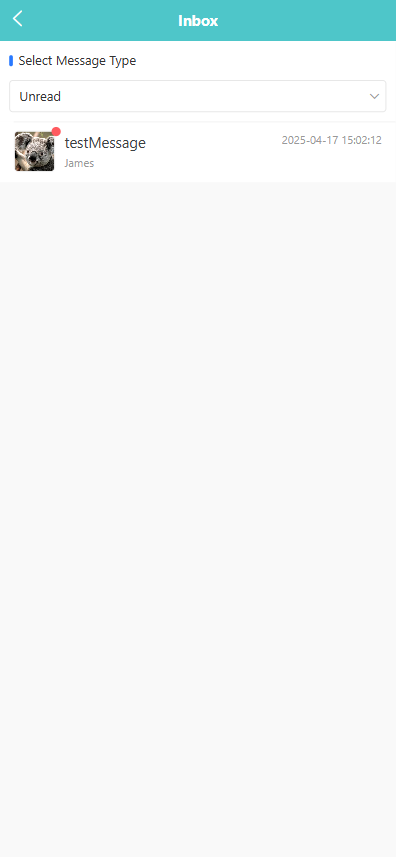
Tap a message to view details, including the sender, creation time, and content. To reply, enter your response in the 【Reply】 field and tap 【Reply】. Tap 【Close】 to exit.
Outbox
Tap 【Outbox】 to view messages you have sent. You can:
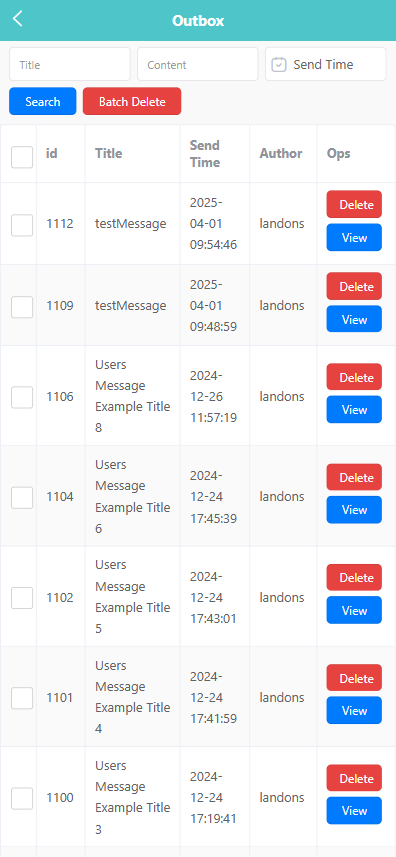
- Filter messages by 【Title】, 【Content】, and 【Send Time】.
- Tap 【Search】 to apply filters or 【Reset】 to clear them.
- Tap 【Delete】 to remove individual messages or use 【Batch Delete】 for multiple selections.
- Tap 【View】 to check reading and reply status of each recipient.
2. Notifications
This section includes 【Notice Box】 and 【Add Notice】.
Notice Box
Tap 【Notice Box】 to view announcements from the kindergarten.
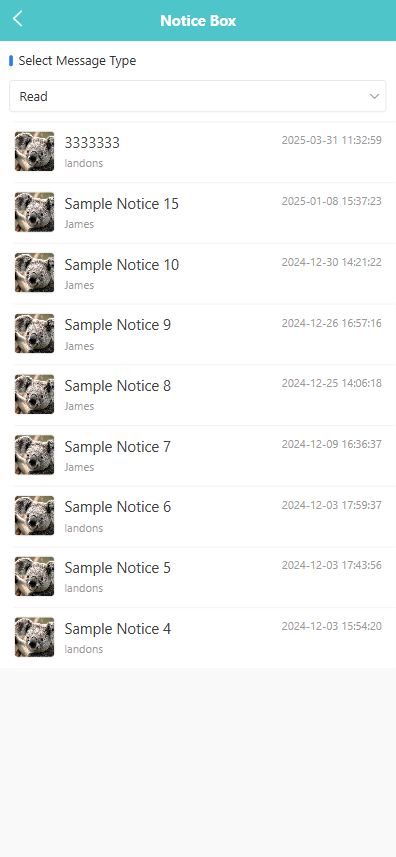
- Use the dropdown menu to filter by 【Unread】 or 【Read】 status.
- Tap a notice to view full details including sender, creation time, and body text.
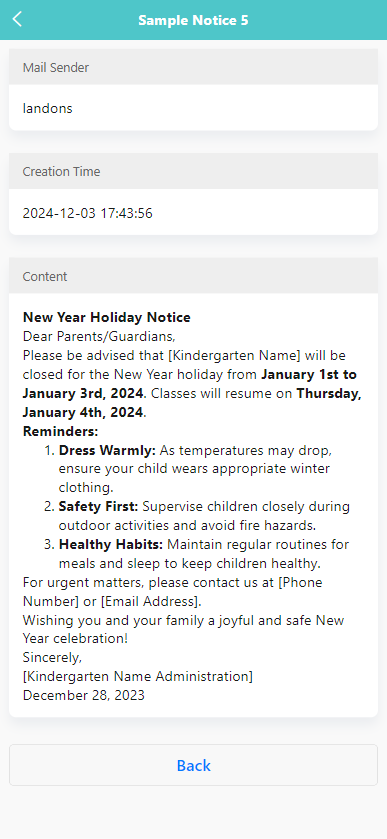
- Tap 【Back】 to exit the detail view.
Add Notice
Tap 【Add Notice】 to create a new announcement. You can:

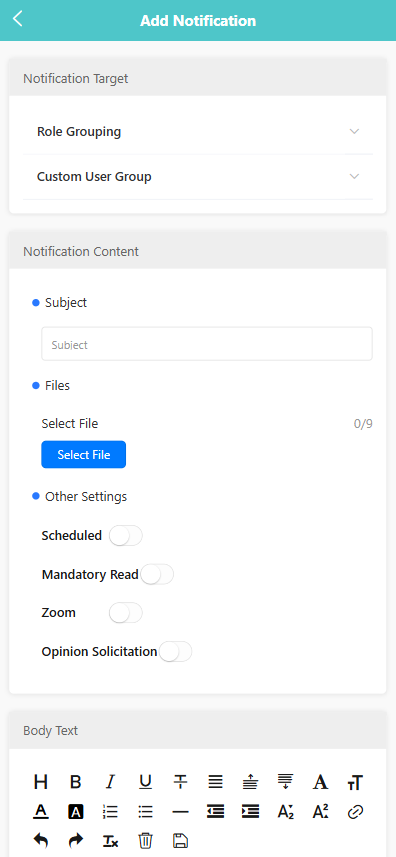
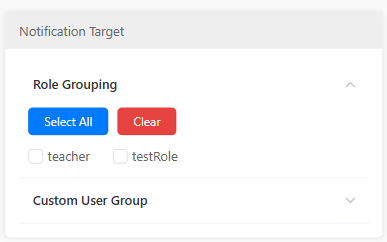
-
Choose a target audience by selecting from 【Role Grouping】 or 【Custom User Group】.
-
Enter the 【Subject】 and 【Body Text】 using the editor.
-
Upload up to 9 attachments via the 【Select File】 button.
-
Under 【Other Settings】, enable options such as 【Scheduled】, 【Mandatory Read】, 【Zoom】, and 【Opinion Solicitation】.
-
For opinion solicitation, configure question types and options, and set a cutoff time.
-
Tap 【Submit】 to publish the notice.
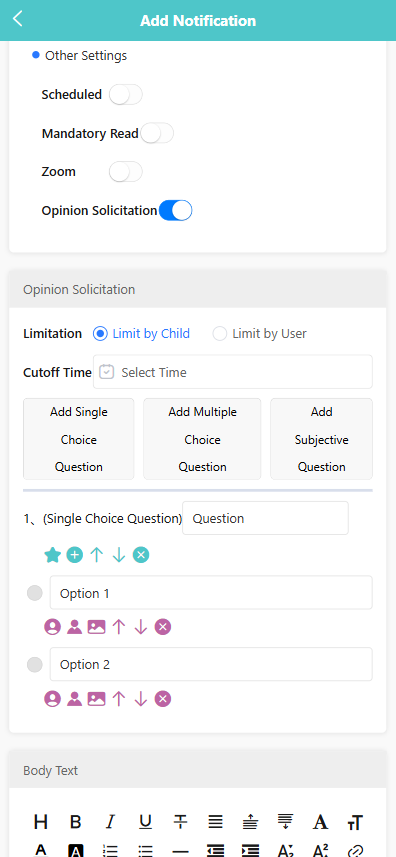
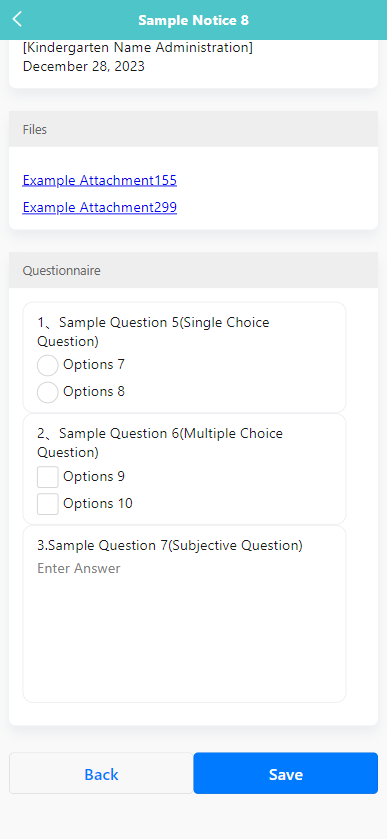
📝 Enable Opinion Solicitation in Notifications
To collect responses through a notification, toggle the 【Opinion Solicitation】 switch to enable the survey feature. Once enabled, you can configure the following:
- Limitation:
Choose how responses are limited:
- 【Limit by Child】: Each child can submit one response, regardless of how many guardians are associated with the account.
- 【Limit by User】: Each user (parent or guardian) can submit one response individually.
- Cutoff Time: Set a deadline for when the survey will stop accepting responses by selecting a date and time in the 【Select Time】 field.
- Question Types:
Add one or more questions by choosing from the following:
- 【Add Single Choice Question】 – Only one option can be selected.
- 【Add Multiple Choice Question】 – Multiple options can be selected.
- 【Add Subjective Question】 – Allows open-ended text responses.
Each question can be edited, reordered, or deleted as needed. Use the icons below each option to manage visibility, order, and deletion.
📥 View Questionnaire Results
If a notification includes a questionnaire (such as single choice, multiple choice, or subjective questions), administrators can export the collected responses for review and analysis.
📤 1. Export Questionnaire Results
Long press a notification that contains a questionnaire. In the pop-up menu, select 【Export Result】.
This will generate and download an Excel file containing all the collected responses.
📊 2. Excel File Content
The exported Excel file includes the following columns:

- Serial number: The order of submissions
- Name: The name of the respondent (user)
- Child's Name: The associated child (if applicable)
- Fill-in date: The submission time
- Class: The class or group associated with the child
- Each Question Title: One column per question, showing selected or written responses
3. Sys Notifs
This section includes 【Sys Notifs】 and 【Contact Us】.
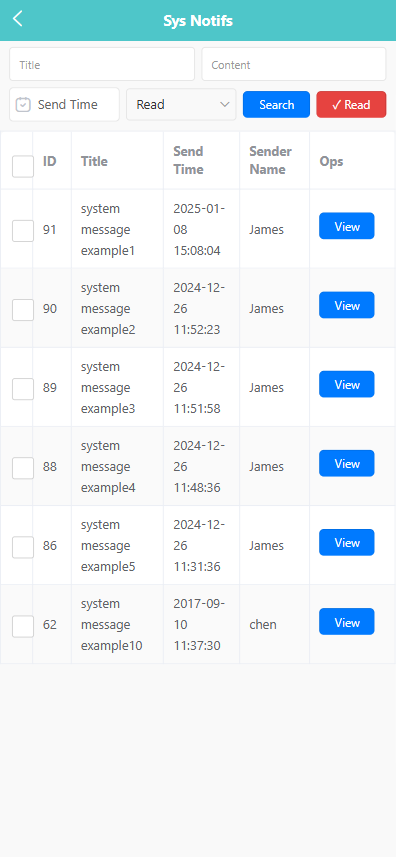
Sys Notifs
Tap 【Sys Notifs】 to view messages sent by the system.
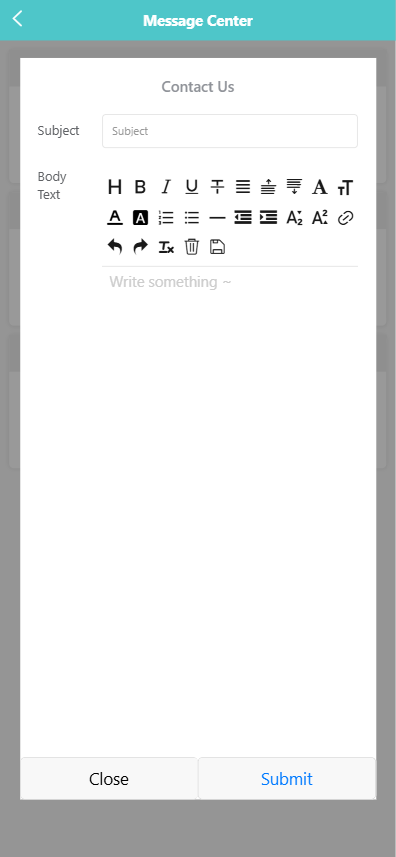
Contact Us
Tap 【Contact Us】 to view school contact information or send inquiries.
Activity Application
This section allows staff to submit and review material requests related to upcoming class or school-wide activities. Users can create, view, approve, or recall applications, and manage them in batch.
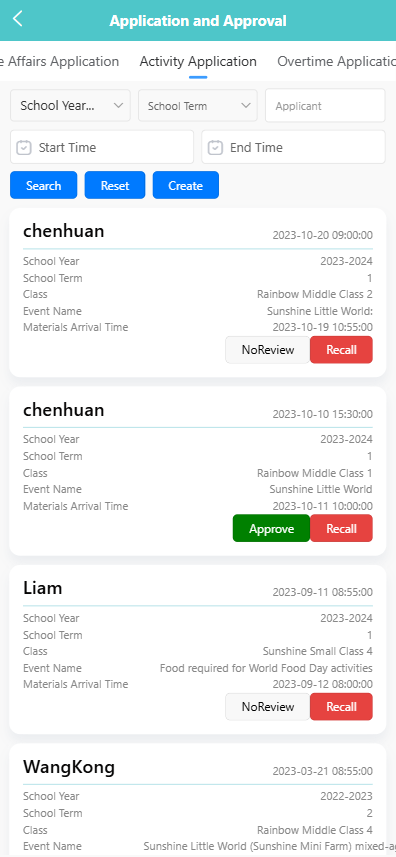
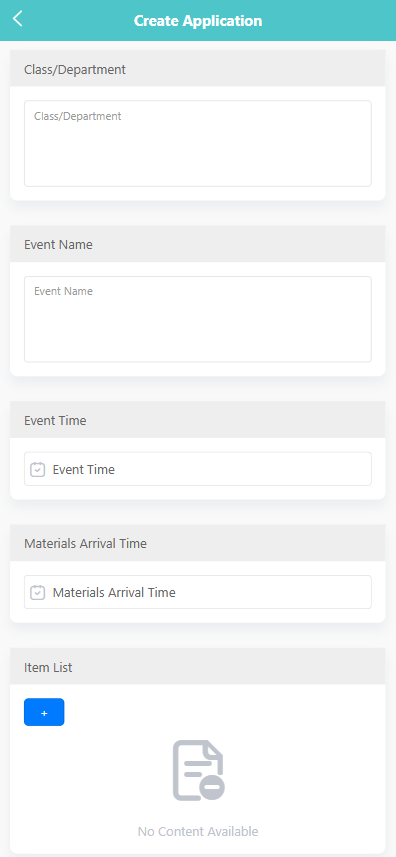
✏️ 1. Create an Activity Application
-
Navigate to the 【Activity Application】 tab under 【Application and Approval】.
-
Tap the 【Create】 button.
-
Fill in the following fields:
- Class/Department: Enter the class name or department.
- Event Name: Specify the activity title.
- Event Time: Set the date and time of the event.
- Materials Arrival Time: Indicate when the materials should arrive.
-
Tap the ➕ icon under “Item List” to add items. For each item:
- Enter the item name, quantity, specifications, and any remarks.
-
Tap 【Save】 to submit the application.
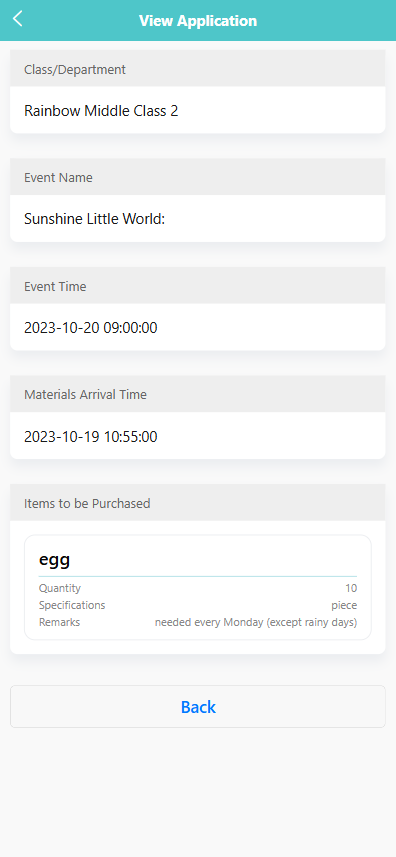
🔍 2. View Application Details
-
On the main list, tap any entry to view details.
-
You can see:
- Class/Department, Event Name, Event Time, Materials Arrival Time
- A list of requested items including quantity, specifications, and notes.
✅ 3. Approve or Recall Applications
- Applications with status NoReview can be reviewed by authorized users.
- Tap 【Approve】 to approve or 【Recall】 to withdraw the application.
- Approved entries are updated immediately.
🗑 4. Batch Delete Applications
- Long press an application entry to enable selection mode.
- Select multiple applications or tap 【Select All】.
- Tap 【Delete】 to remove the selected records in batch.
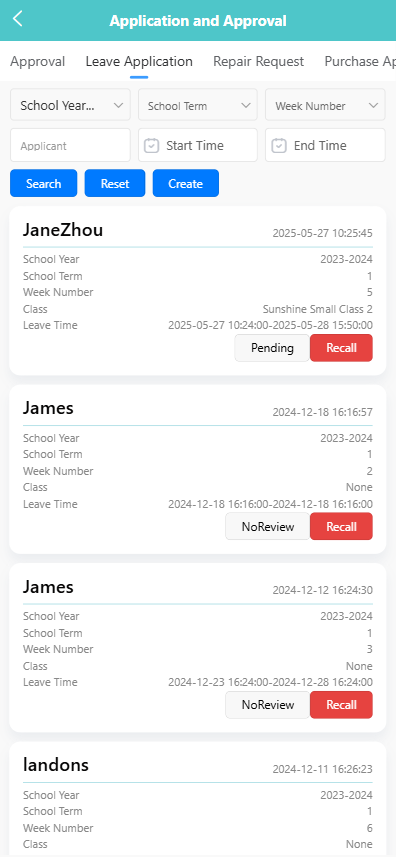
Leave Application
This section allows staff members to apply for leave and view the approval status of past applications.
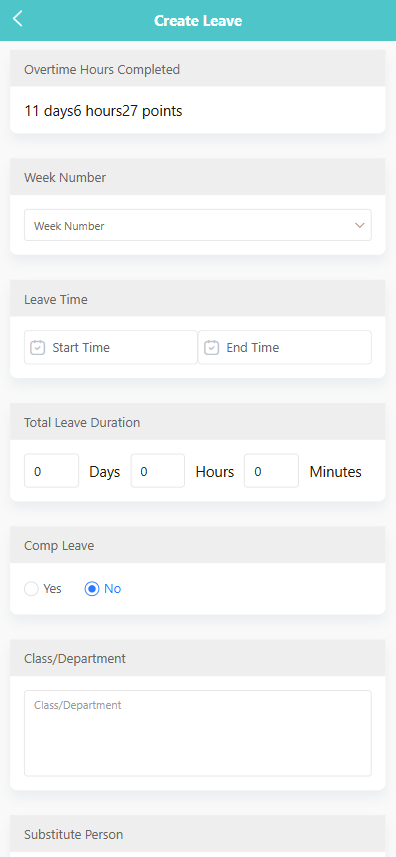
✅ 1. Submit a Leave Application
To submit a leave request:
-
Tap the 【Create】 button on the top-right corner of the screen.
-
Fill in the following fields:
- Overtime Hours Completed: Displays accumulated overtime if applicable (auto-filled).
- Week Number: Select the week during which the leave falls.
- Leave Time: Select start and end date/time.
- Total Leave Duration: System auto-calculates duration.
- Comp Leave: Choose whether the leave is compensatory (Yes/No).
- Class/Department: Input your affiliated class or department.
- Substitute Person: Specify the colleague who will substitute during your absence.
- Leave Type: Select leave category (e.g., sick leave, personal leave).
- Leave Reason: Provide a brief explanation.
-
Tap 【Save】 to submit the application.
🔍 2. View Leave Records
To check past or current leave requests:
- You can filter applications by School Year, School Term, Week Number, Applicant, or by Date Range.
- Each record displays the leave duration, class, week, and approval status (e.g., Pending, NoReview).
Tap a record to view full details.
📝 3. View Leave Details
Tap any leave entry to view submitted information, including:
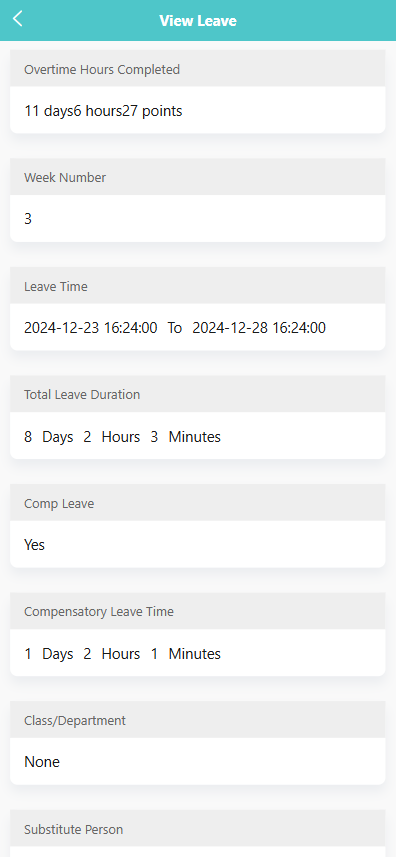
- Overtime hours
- Leave period
- Comp leave status
- Class/department
- Substitute teacher
- Leave type and reason
Use the 【Back】 button to return to the list.
🗑️ 4. Delete Leave Applications
To delete one or more applications:
- Long-press a record to trigger the multi-select mode.
- Tap the checkbox beside each record you wish to delete.
- Tap 【Delete】 in the top toolbar.
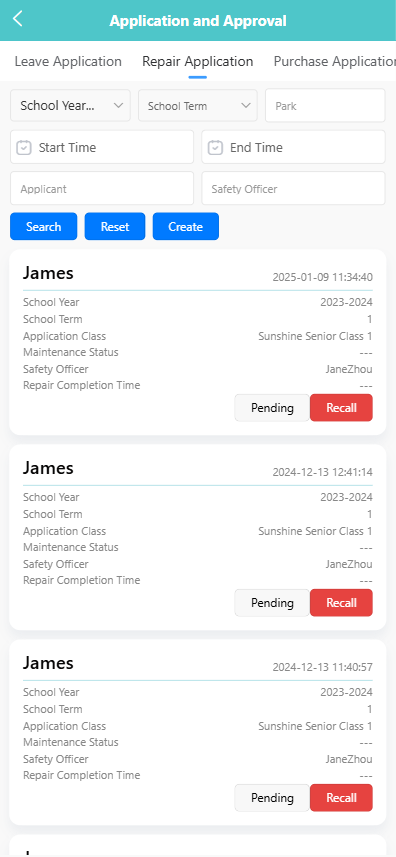
Repair Application
This module allows staff to submit repair requests for damaged equipment and track approval status. Users can select the relevant department, assign a safety officer, and provide detailed descriptions of maintenance needs.
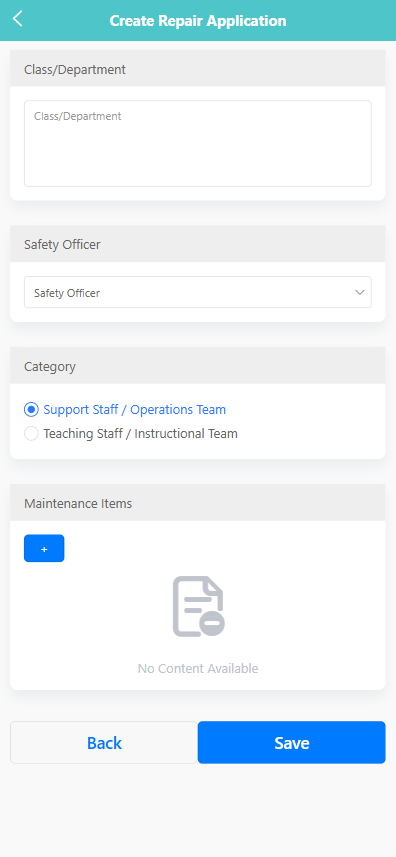
📝 1. Submit a Repair Application
-
Navigate to the 【Repair Request】 tab under Application and Approval.
-
Tap the 【Create】 button.
-
Fill in the required fields:
- Class/Department: Enter the name of the class or department reporting the issue.
- Safety Officer: Select the staff member responsible for overseeing the repair.
- Category: Choose the appropriate team – either Support Staff / Operations Team or Teaching Staff / Instructional Team.
-
Tap the 【+】 button under Maintenance Items to add a damaged item:
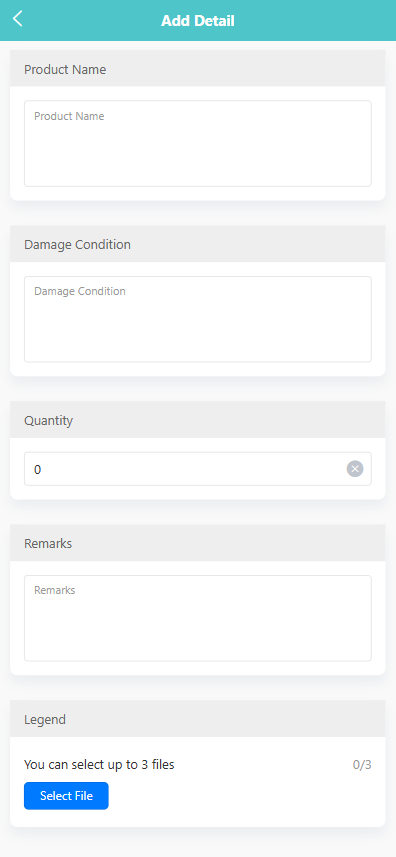
- Enter the item name, quantity, damage condition, and remarks.
- Optionally upload images to support the repair request.
-
Tap the 【Save】 button to submit the request.
📄 2. View Repair Request Details
-
Tap on a request entry in the list to view its details.
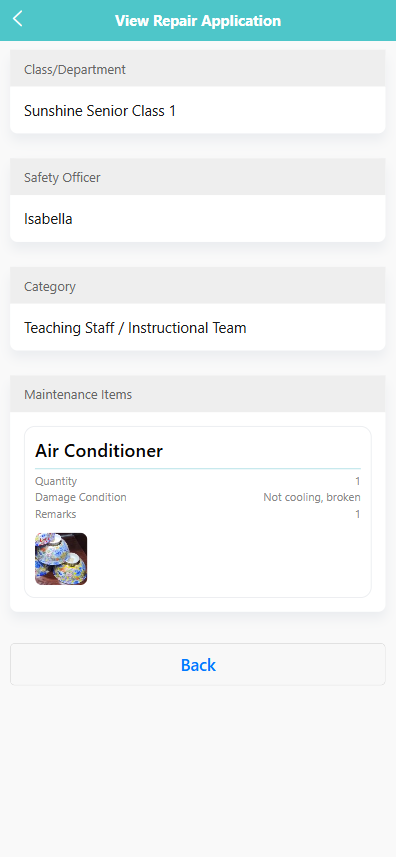
-
The following information is displayed:
- Class/Department
- Safety Officer
- Category
- Maintenance Items, including quantity, condition, remarks, and any attached images.
📤 3. Recall or Approve Requests
- Tap and hold a request entry to reveal the action menu.
- Select 【Recall】 to withdraw a pending request.
- Authorized users may also tap 【Approve】 to confirm the request.
🔍 4. Filter and Search Requests
You can filter requests by:
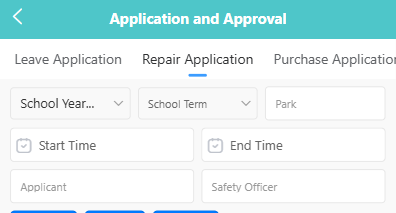
- School Year
- School Term
- Location (e.g., Park)
- Date Range
- Applicant
- Safety Officer
Enter the search criteria and tap the 【Search】 button.
Office Affairs Application
This application is primarily for various office-related affairs in the school, such as applying for a document certificate, applying for expenses to comfort an injured child, etc. Any office-related affairs you think of can be submitted here.

📌 1. View Office Affairs Applications
On the main page of the 【Office Affairs Application】 tab, users can:

- Filter applications by school year, term, and applicant.
- Click 【Search】 to display relevant applications.
- Each application card shows:
- Applicant name
- Submission time
- School year & term
- Department/Other
- Expense Status
- Status buttons such as 【NoReview】 or 【Recall】 are also visible.
📝 2. Create a New Application
-
Tap the 【Create】 button.
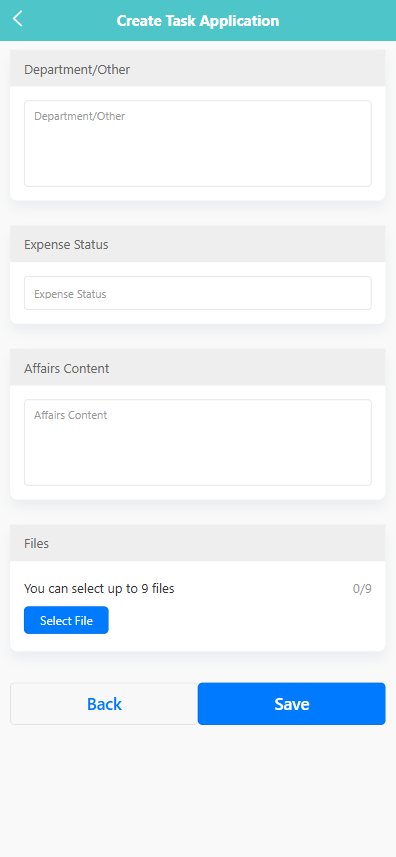
-
Fill in the following fields:
- Department/Other: e.g., “Labor Union”
- Expense Status: Enter the expense amount (e.g., “33.12”)
- Affairs Content: Describe the purpose (e.g., “A batch of colored pens for teaching purposes”)
- Files: Upload up to 9 supporting documents or receipts by clicking 【Select File】.
-
Tap 【Save】 to submit the application.
🔍 3. View Application Details

Tap an existing application card to view full details:
- Department
- Expense status
- Affairs content
- Uploaded files (clickable links for download)
Overtime Application
This module allows staff to submit, view, and manage overtime applications, including entering actual overtime hours for each staff member involved.
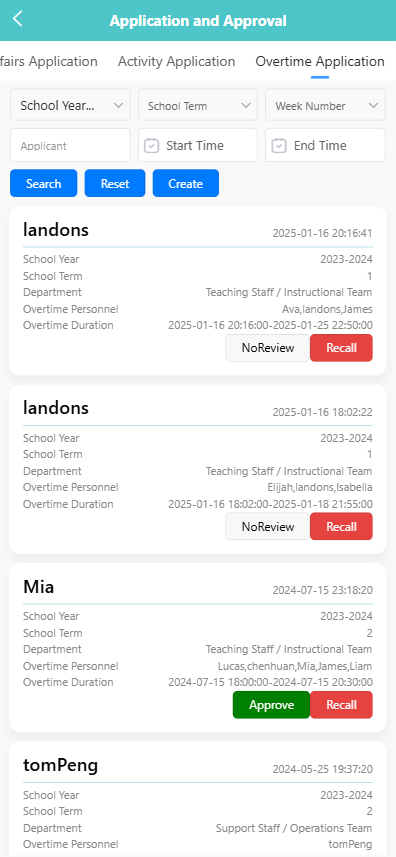
📝 1. Create an Overtime Application
-
Tap the 【Create】 button at the top of the Overtime Application page.

-
Fill in the following fields:
- Week Number: Select the week of the application.
- Leave Time: Select the start and end times for the overtime.
- Department: Choose either 【Educational Care】 or 【Support Staff / Operations Team】.
- Overtime Location: Specify where the overtime work will take place.
- Overtime Personnel: Select one or more staff members involved in the overtime.
- Cause: Enter the reason for the overtime request.
-
Tap 【Save】 to submit the application.
🔍 2. View Application Details
-
Tap on an existing record to view the details.
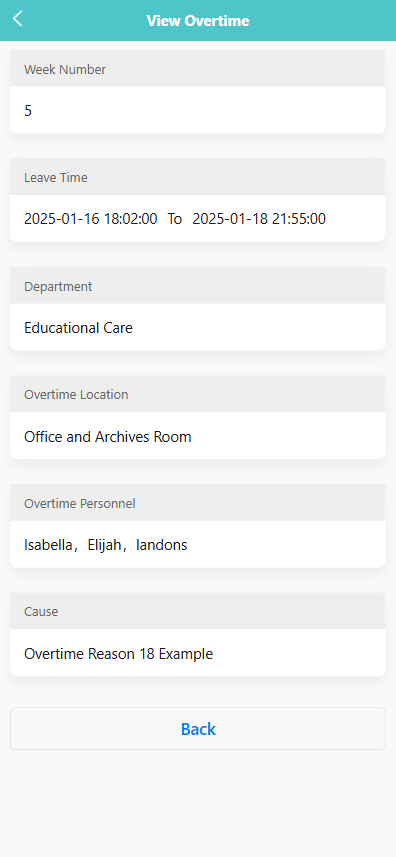
-
The page displays the following information:
- Week Number
- Leave Time
- Department
- Overtime Location
- Overtime Personnel
- Cause
✅ 3. Enter Actual Overtime Hours
-
If you are responsible for entering actual overtime hours, open the relevant application record.
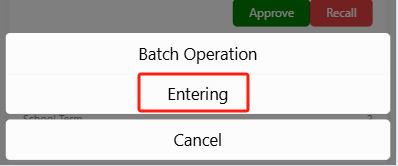
-
Input the number of actual overtime hours worked by each person in the designated fields.

-
Tap 【Save】 to confirm the entry.
🗂 4. Batch Operations
-
Long-press an overtime record to trigger the action menu.
-
Tap 【Batch Operation】 to enter multi-select mode.
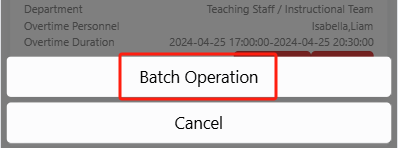
-
Select one or more records.
-
Available batch actions include:
- 【Delete】: Remove selected records.
Purchase Application
This module is used to submit and manage purchase requests for various items needed by the school departments. Users can create applications with item details, track approval statuses, and manage requests via batch operations.
📝 1. Create Purchase Application
-
Click the 【Create】 button on the top right of the screen.

-
On the creation form, fill in the following fields:
-
Class/Department: Enter the name of the department submitting the request.
-
Receiver: Input the name of the person who will receive the items.
-
Category: Select a category such as Support Staff, Teaching Staff, or Trade Union.
-
Remarks: Optionally add remarks related to the request.
-
Item List: Click the 【+】 button to add one or more items including name, quantity, unit price, and specifications.
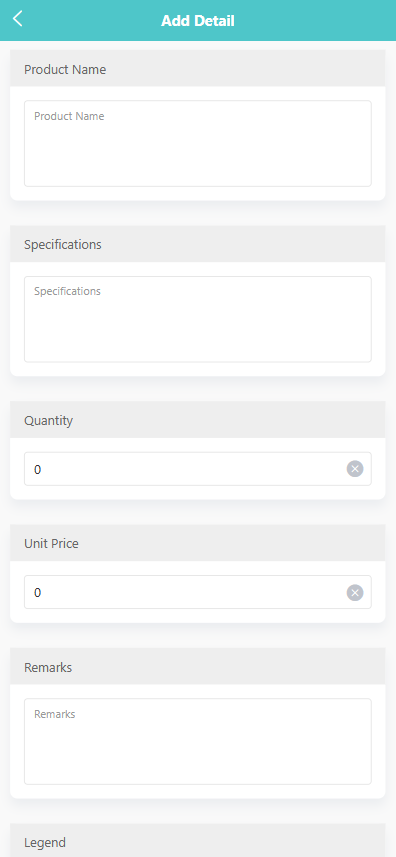
-
-
After completing the form, click 【Save】 to submit.
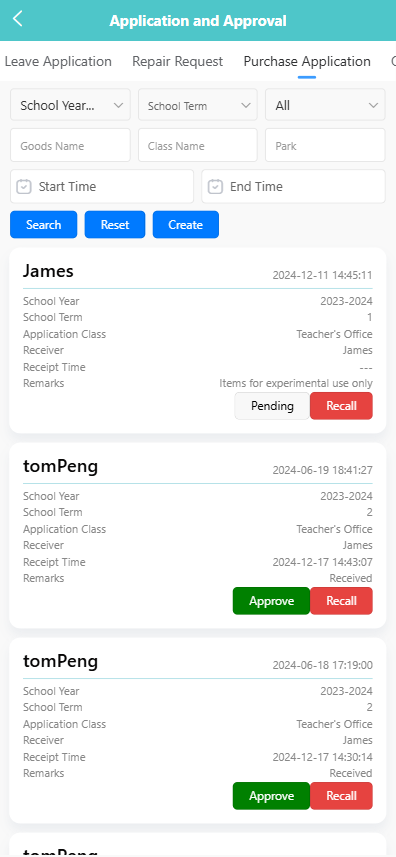
🔍 2. View Purchase Application
-
Tap a record on the list to view its details.
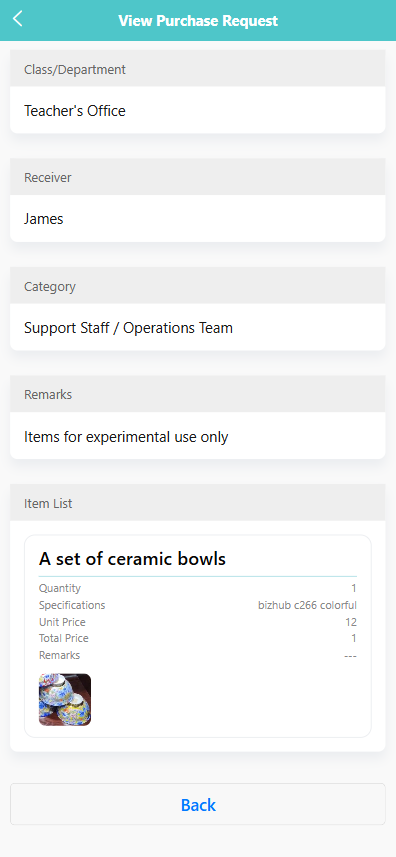
-
The detail screen displays:
- Class/Department, Receiver, Category, Remarks.
- Each item with its name, quantity, unit price, total price, specifications, and images (if attached).
✅ 3. Approve or Recall an Application
- Pending items will show the status 【Pending】 along with a 【Recall】 button.
- Approved applications will be marked as 【Approve】, and if already received, marked as 【Received】.
- Tap 【Recall】 to withdraw an application.
✏️ 4. Edit or Delete an Application
-
Long-press a record to open the pop-up menu.
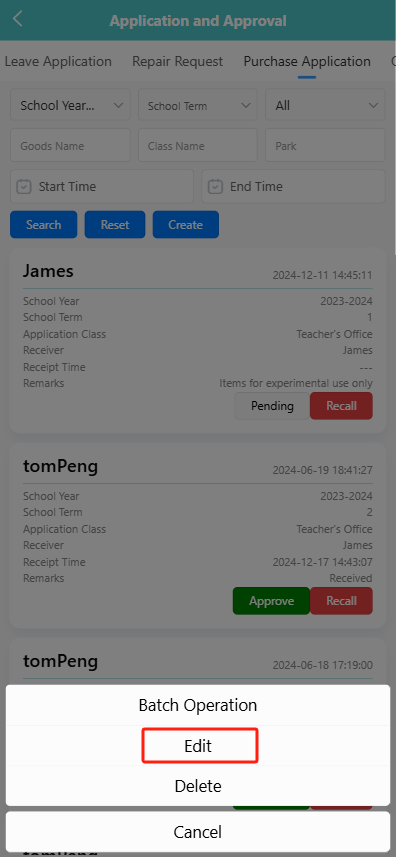
-
Select 【Edit】 to modify details, or select 【Delete】 to remove the request.
-
Confirm deletion when prompted.
📦 5. Batch Operation
- Long-press to trigger the menu, then select 【Batch Operation】.
- On the batch page, you can:
- Select multiple requests.
- Use 【Select All】 or manually select entries.
- Tap 【Delete】 to remove multiple requests at once.
Approval
This module allows users to view and process various application approvals submitted by staff. Users can filter, view details, and approve or reject requests according to their roles in the approval process.
🔍 1. Filter and Search Applications
Users can filter applications by:
- School Year
- School Term
- Approval Status (Pending, Approve, Rejected)
- Applicant
- Creation Time
Click the 【Search】 button to apply filters, or click 【Reset】 to clear them.
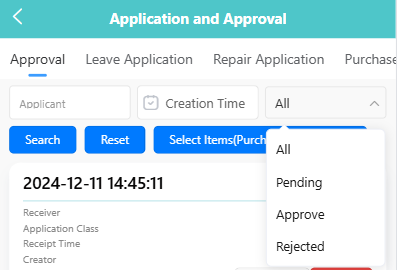
Approval statuses : Each application item is marked with one of the following statuses.
- Pending: The default status for new applications, requiring manual approval from assigned approvers.
- Approve: The application has been approved and is now in effect. All required review steps have been completed successfully.
- Rejected: The application has been denied during the approval process and will not proceed further unless resubmitted.
- NoReview: Automatically approved according to system rules or configuration; no manual review is required.
📋 2. View Approval List
Applications matching the selected filters will be displayed in a list, showing:
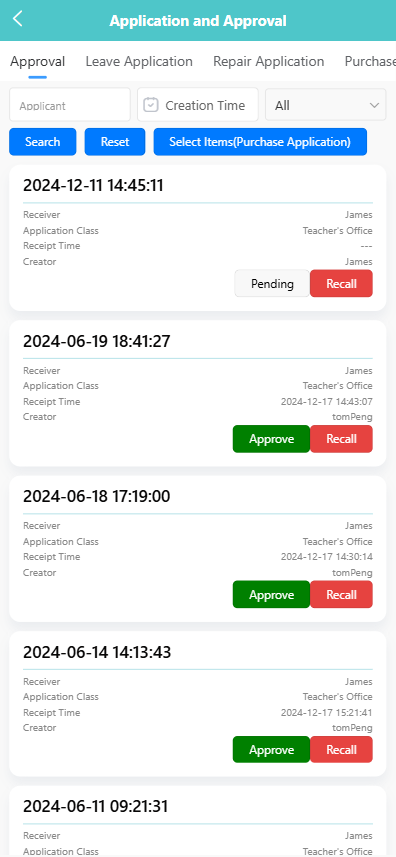
- Receiver
- Application Class
- Receipt Time
- Creator
- Current Approval Status (e.g., Pending, Approve)
Applications marked as 【Pending】 are awaiting review. Tap the status to open the approval process flow.
🧾 3. View Application Details
To view full application details:
-
Tap the application card.
-
Select 【View】 from the pop-up menu.
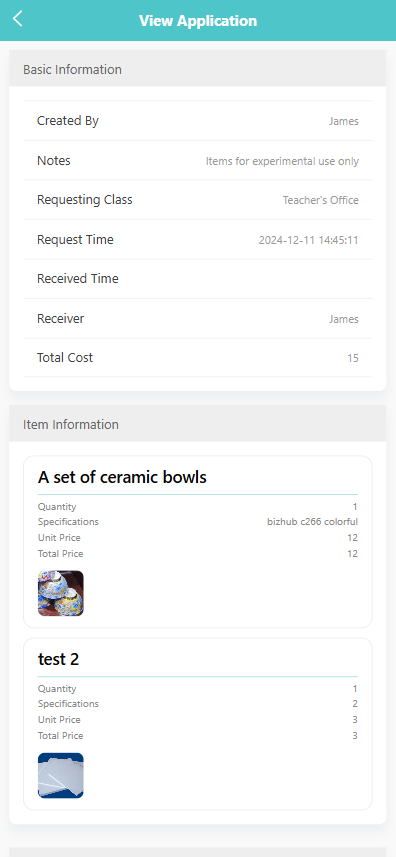
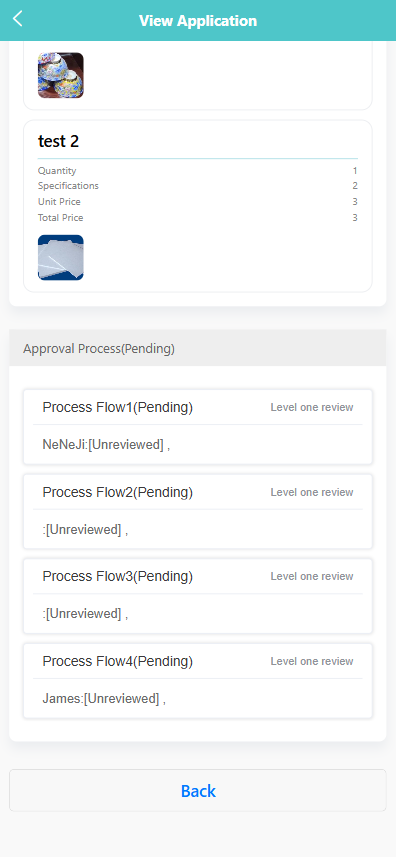
You will see two sections:
- Basic Information (creator, remarks, receipt time, receiver, total amount)
- Item Information (item names, specifications, quantity, unit price, total price)
At the bottom, the approval flow displays each stage and responsible reviewer.
✅ 4. Approve or Reject an Application
To process an application:
-
Long Press the application card.
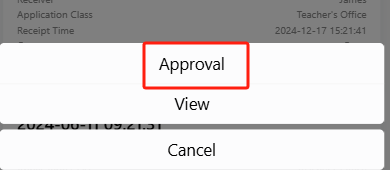
-
Select 【Approval】 from the pop-up menu.
-
On the approval screen, view all process flows.
-
Enter your comments in the 【Approval Comments】 field.
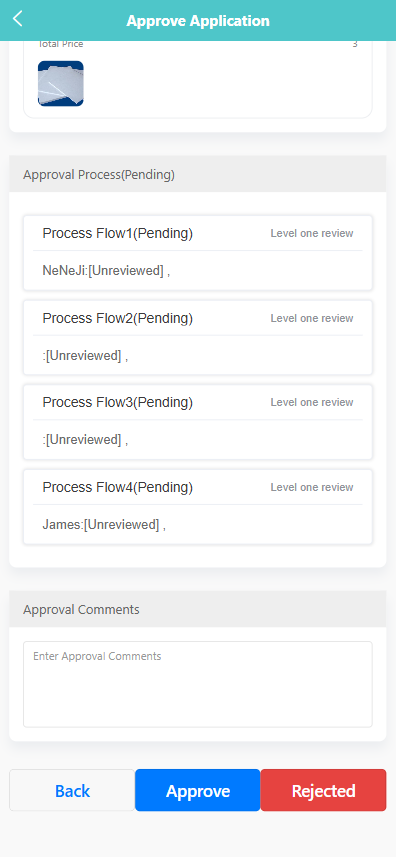
-
Tap 【Approve】 to confirm, or 【Rejected】 to reject.
The system will automatically update the status of the current process node.
Submission Details
This module tracks records submitted by teachers, such as training certificates and research papers.

🔄 Switching Between Submission Types
Use the tabs:
- 【Learning/Training Records】
- 【Paper, Research, Report】
🔍 Searching Submission Records
You may search by:
- Real Name
- Start Time / End Time
Click 【Search】 to filter results, or 【Clear】 to reset the fields.
📘 Viewing Training Records
-
Select a record from the 【Learning/Training Records】 list.
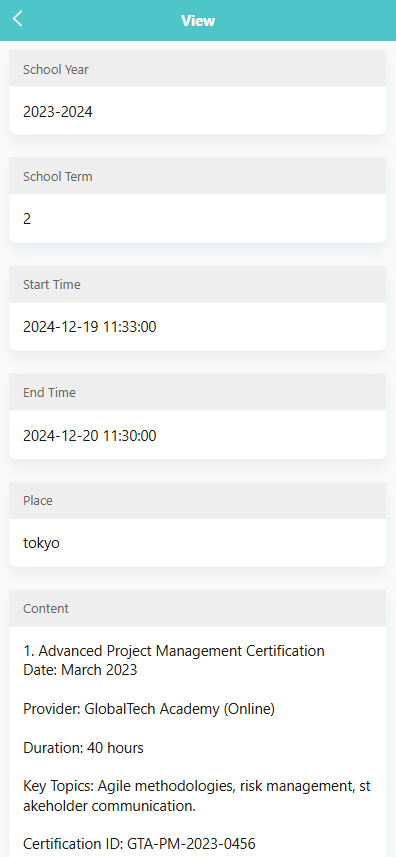
-
View the details such as:
- School Year, Term
- Training Time and Place
- Content, duration, provider
- Certification ID
📚 Viewing Paper/Report Records
-
Tap on any item listed under 【Paper, Research, Report】.
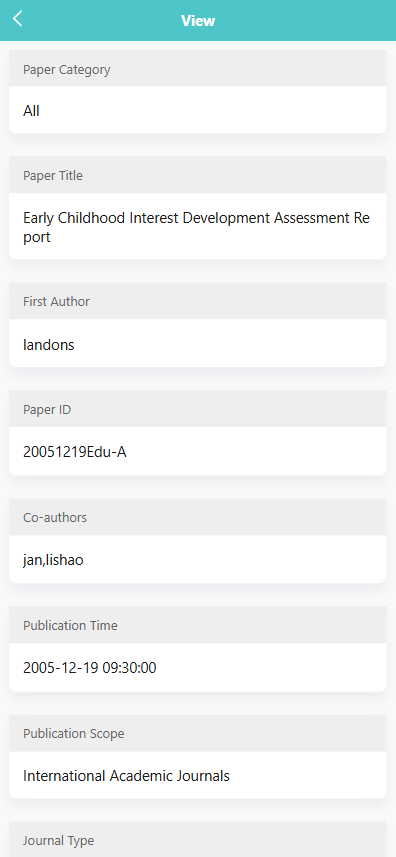
-
View information such as:
- Paper Title, Authors, Publication Time
- Scope, Journal Type, and Co-authors
- Paper ID, Creator, and Creation Time
Teacher Archives
This module allows staff members to view, download, and manage teacher-related records, including detailed profiles, employment history, and educational background.
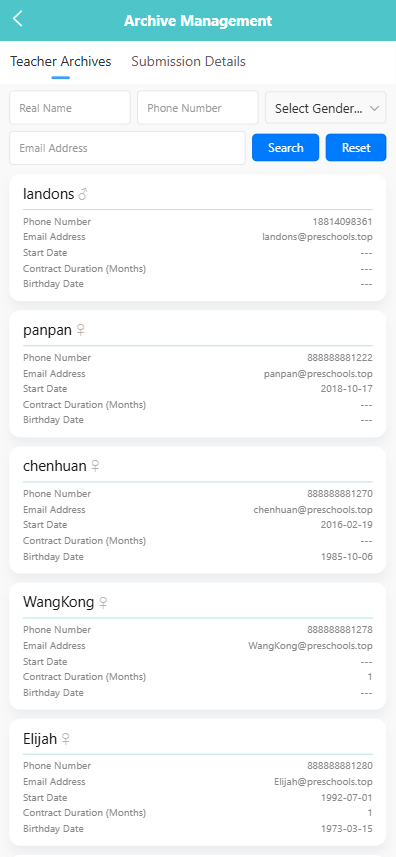
🔍 Searching for Staff Records
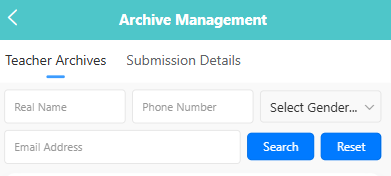
You can search by:
- Real Name
- Phone Number
- Email Address
- Gender
Click 【Search】 to run the query or 【Reset】 to clear all filters.
📄 Viewing a Teacher's Profile
-
Tap on any staff card to view their full archive.
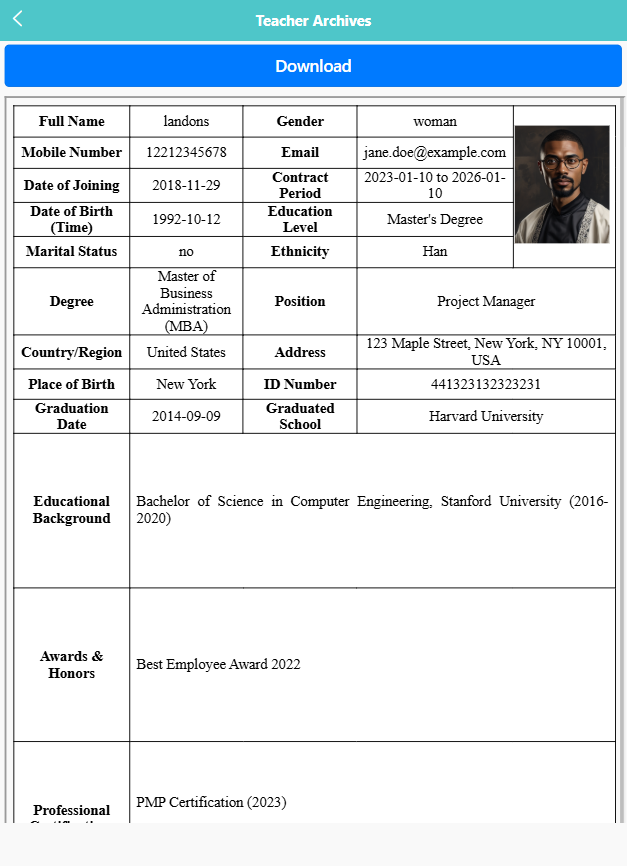
-
The detailed profile includes:
- Personal information (Name, Gender, Birth Date, ID)
- Job info (Position, Contract Period, Employment Date)
- Education background, awards, certifications, etc.
-
Click the 【Download】 button at the top to save a copy of the profile.
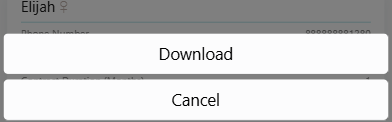
Tip: Long-pressing a record will open an action menu with options like 【Download】.
My Bill
The My Bill module allows users to view, filter, print, and pay their bills. Bills may include fees for various activities, meals, or other services provided by the preschool.
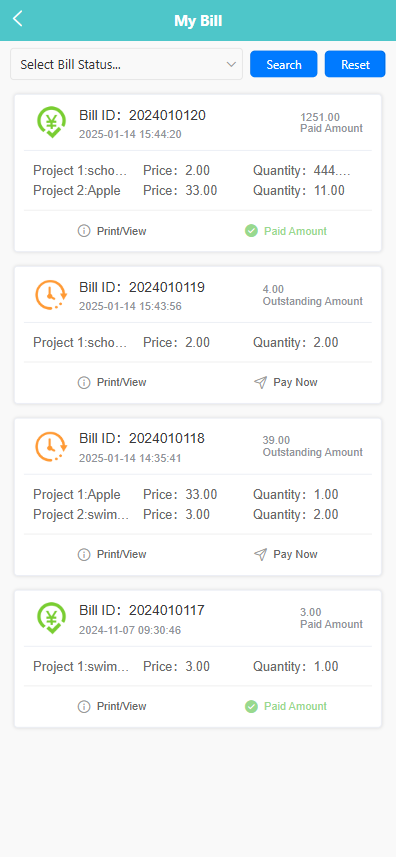
🔍 Filtering Bills
-
Use the dropdown menu at the top to filter bills by:
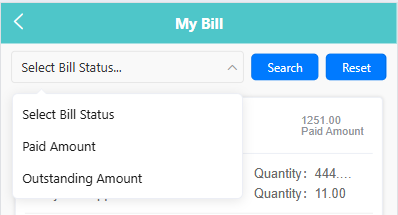
- Paid Amount
- Outstanding Amount
-
Click the 【Search】 button to apply the filter.
-
Click 【Reset】 to clear all filters.
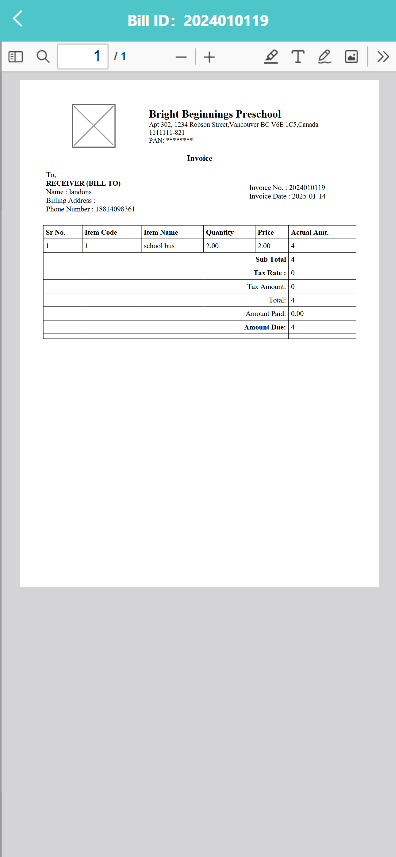
🧾 Viewing Bill Details
-
Each bill displays key details such as:
- Bill ID
- Date
- Item Description
- Price and Quantity
- Payment Status (Paid or Outstanding)
-
Tap the 【Print/View】 link under a bill to open a printable version of the invoice.
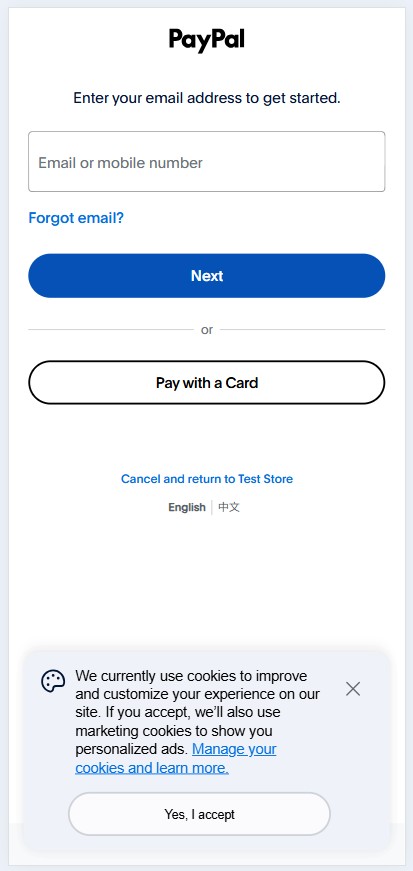
💰 Paying a Bill
- If a bill shows an Outstanding Amount, a 【Pay Now】 button will appear.
- Tap the 【Pay Now】 button to open the payment gateway.
- On the PayPal page, complete your payment by:
- Logging in to your PayPal account, or
- Selecting “Pay with a Card” to pay directly using a credit/debit card.
Child Extra Meal Management
The Child Extra Meal section allows staff members to record and manage children's lunch and dinner statuses while attending school. This helps ensure meal arrangements are accurate and up to date for each child.
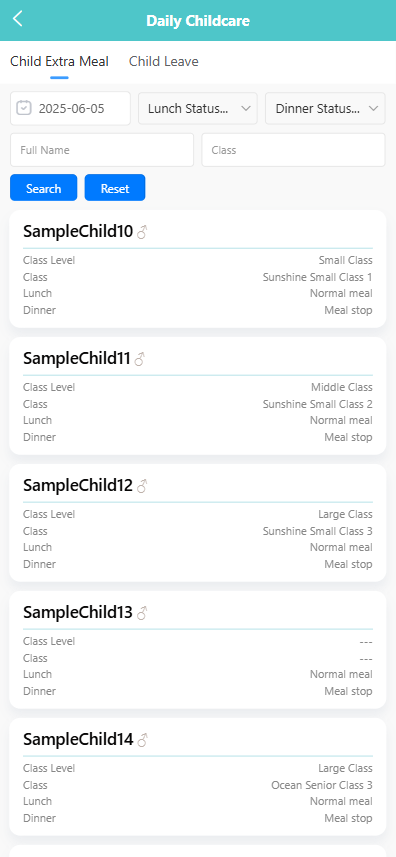
🔍 Searching for Meal Records
Use the filter bar at the top of the screen to search by:
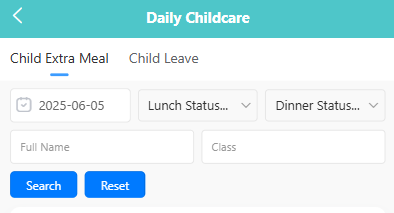
- Date
- Lunch Status
- Dinner Status
- Full Name
- Class
- Select the desired filters from the dropdown menus.
- Click the 【Search】 button to view matching records.
- Click 【Reset】 to clear all filters and return to the full list.
📋 Viewing and Editing Meal Information
Each child's meal record includes:
- Class Level
- Class
- Lunch (e.g., Normal meal)
- Dinner (e.g., Meal stop)
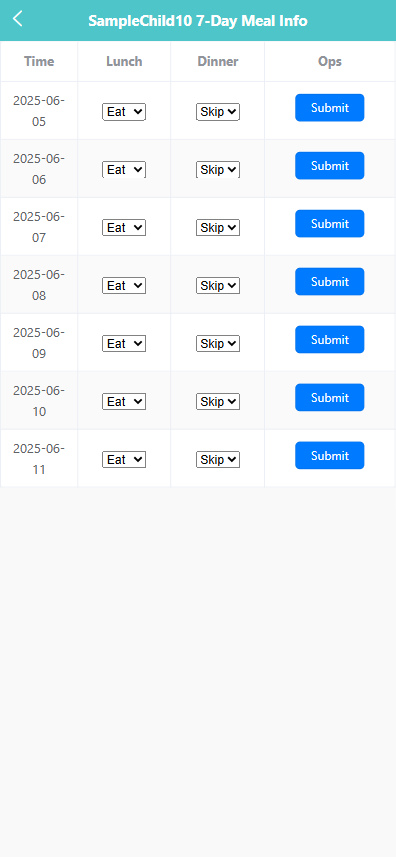
To view or edit the upcoming week’s meal status for a specific child:
- Tap the child’s name from the record list.
- On the 7-day meal info screen, use the dropdowns to set the status for Lunch and Dinner:
- Options: Eat, Skip, etc.
- Click the 【Submit】 button next to each date to save changes.
⚠️ Note: You cannot edit the current day's meal status after 2:00 PM. A system prompt will appear with: “Cannot edit extra meal information after 2 PM on the same day.”
Child Leave Request
The Child Leave tab is used to record and manage children's leave requests during the school year. Administrators can add, update, and delete leave records, as well as view leave history filtered by date, name, and class.
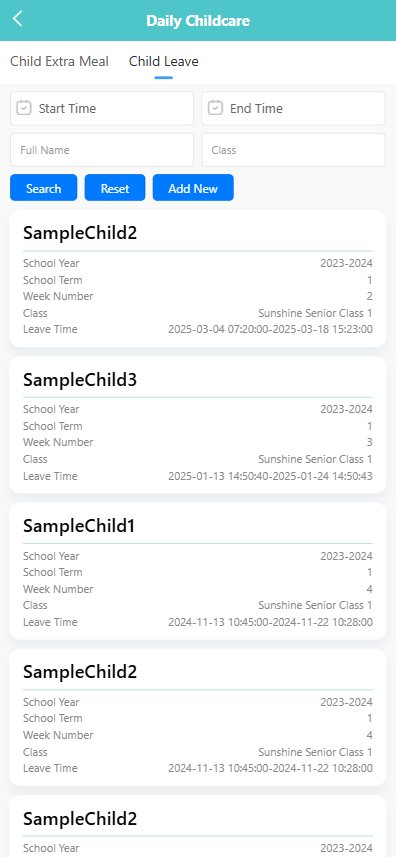
🔍 Searching for Leave Records
-
Use the filters at the top of the screen to search by:
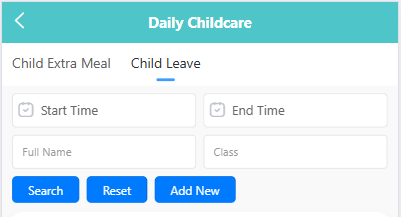
- Start Time
- End Time
- Full Name
- Class
-
Click the 【Search】 button to display matching records. Click 【Reset】 to clear all filters.
➕ Adding a Leave Record
-
Click the 【Add New】 button.
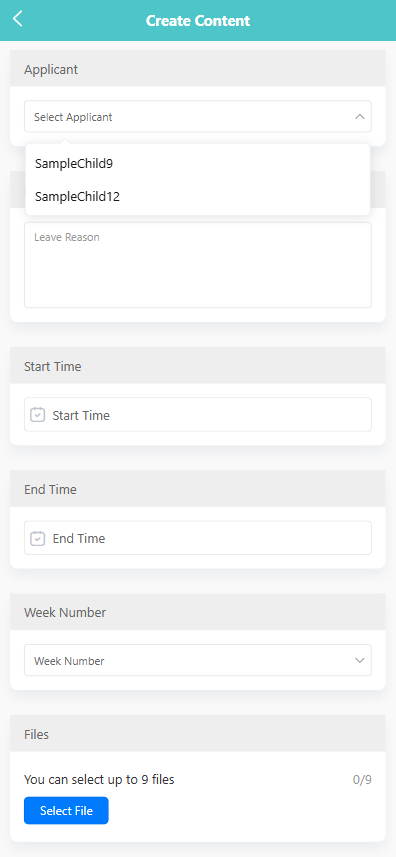
-
On the creation page, complete the following fields:
- Applicant: Select the child taking leave.
- Leave Reason: Enter the reason for the leave (e.g., sick leave, family emergency).
- Start Time: Select the leave start date and time.
- End Time: Select the leave end date and time.
- Week Number: Choose the week of the term this leave corresponds to.
- Files: Optionally upload up to 9 supporting files.
-
Click the 【Save】 button to submit the leave record.
✏️ Editing a Leave Record
-
Long-press on a leave entry to open the pop-up menu.
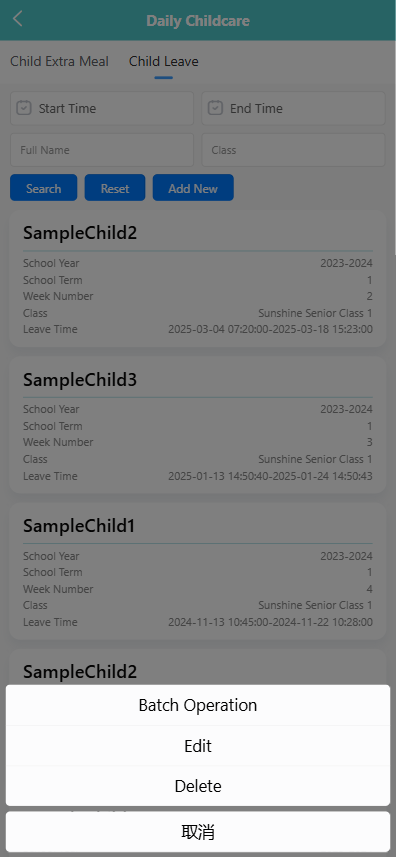
-
Tap 【Edit】 to open the record.
-
Modify the necessary fields, such as reason, start/end time, or week number.
-
Click 【Save】 to apply the changes.
🗑️ Deleting a Leave Record
- Long-press on a leave entry to open the pop-up menu.
- Tap 【Delete】.
- Confirm the system prompt to delete the selected leave record.
🧰 Batch Operations
- Long-press to activate selection mode.
- Select multiple records or tap 【Select All】.
- Tap the 【Batch Operation】 button, and choose:
- 【Edit】 to update multiple records (if applicable).
- 【Delete】 to remove selected entries.
Class Level
The Class Level Management tab allows administrators to assign and manage grade-level lead teachers for each class level (e.g., Large Class, Middle Class). This helps ensure accountability and support across multiple classrooms within the same developmental level.
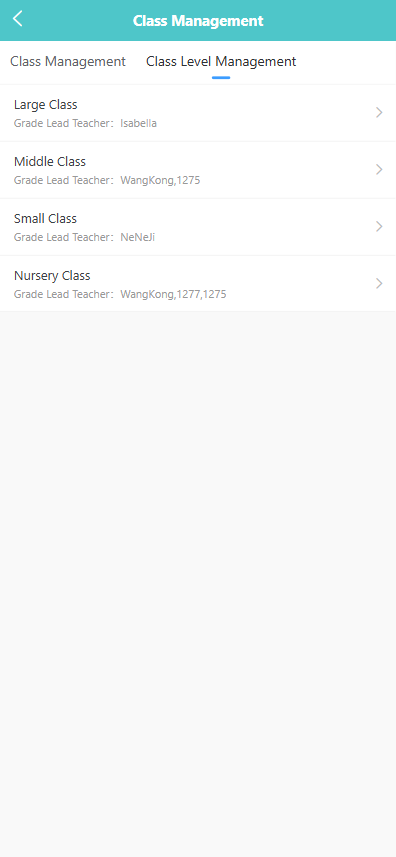
🔍 Viewing Grade Lead Assignments
Use this screen to view the lead teacher(s) assigned to each class level:
- Large Class
- Middle Class
- Small Class
- Nursery Class
Each level shows its currently assigned Grade Lead Teacher(s).
👤 Assigning a Grade Lead Teacher
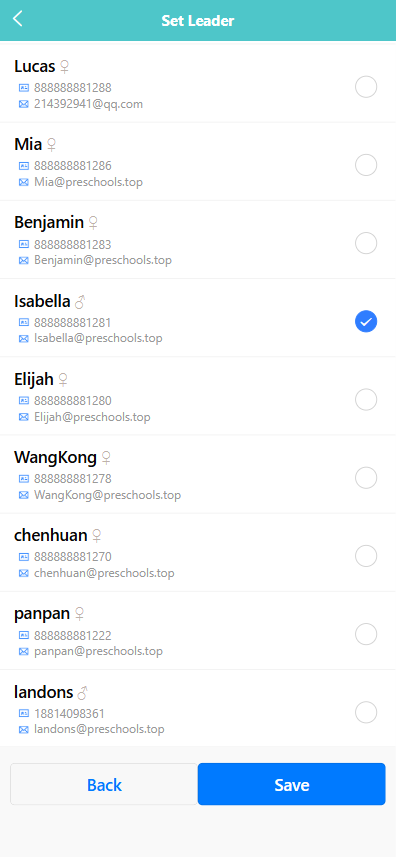
- Tap on the desired class level (e.g., “Large Class”) from the list.
- On the Set Leader screen, tap the circle next to the teacher’s name to select them. You may select multiple teachers if needed.
- Tap the 【Save】button to confirm the assignment.
Each teacher’s name, gender, phone number, and email address are displayed to help identify the correct person.
Class Management
The Class Management section allows administrators to view and manage all classes in the preschool, including class names, size, grade levels, and assigned teachers.
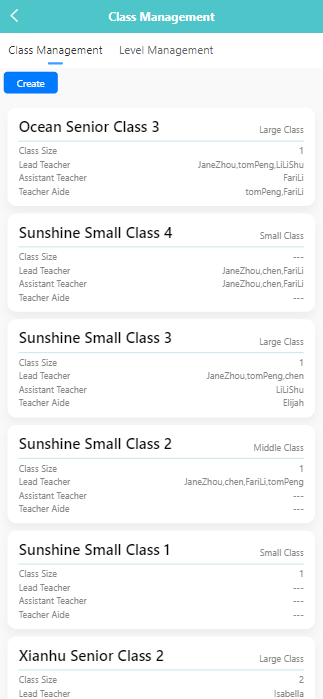
🔍 Viewing Class Information
- All existing classes are listed under the Class Management tab by default.
- Each class card displays the following information: • Class Name • Grade Level • Class Size • Assigned Lead Teacher(s), Assistant Teacher(s), and Teacher Aide(s)
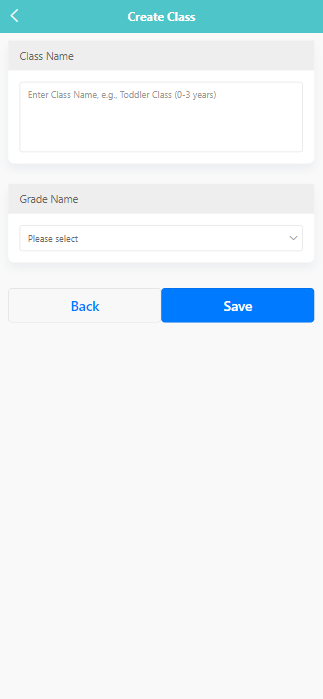
➕ Creating a New Class
-
Click the 【Create】 button.
-
Enter the class name in the 【Class Name】 field (e.g., “Toddler Class (0–3 years)”).
-
Select the grade level from the 【Grade Name】 dropdown menu (e.g., “Large Class”, “Middle Class”, etc.).
-
Click 【Save】 to complete the creation.
✏️ Editing an Existing Class
-
Long press on the class entry to open the action menu.
-
Select 【Edit】.

-
Modify the class name or grade level as needed.
-
Click 【Save】 to update the changes.
🗑️ Deleting a Class
- Long press on the class entry to open the action menu.
- Select 【Delete】.
- A system prompt will appear asking “Are you sure you want to delete the class?”
- Click 【OK】 to confirm or 【Cancel】 to abort.
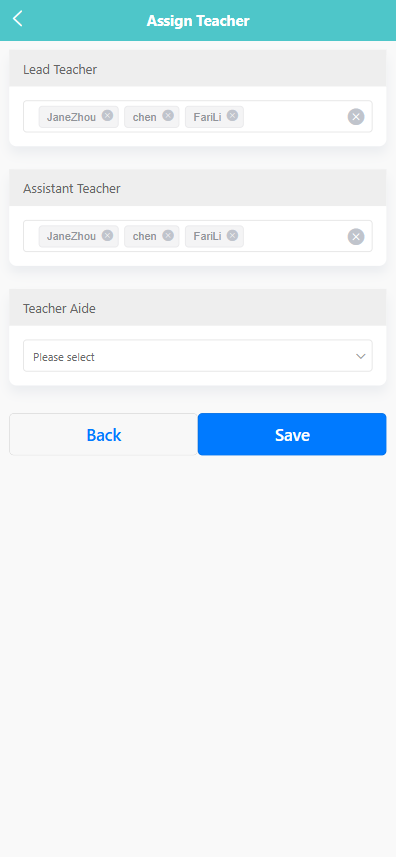
🔧 Assigning Teachers to a Class
-
Click a class card to assigning teachers to a class.
-
On the edit screen, scroll to the teacher assignment section.
-
Under each category, select the appropriate staff members: • Lead Teacher – Select one or more lead teachers. • Assistant Teacher – Select assistant teachers. • Teacher Aide – Choose a staff member responsible for classroom care routines.
-
Tap 【Save】 to apply the changes.
Activity Schedule
This feature is the central place for publishing the school's time schedule. In addition to the activity schedule, users can also upload venue schedules and more, as shown in the image below:
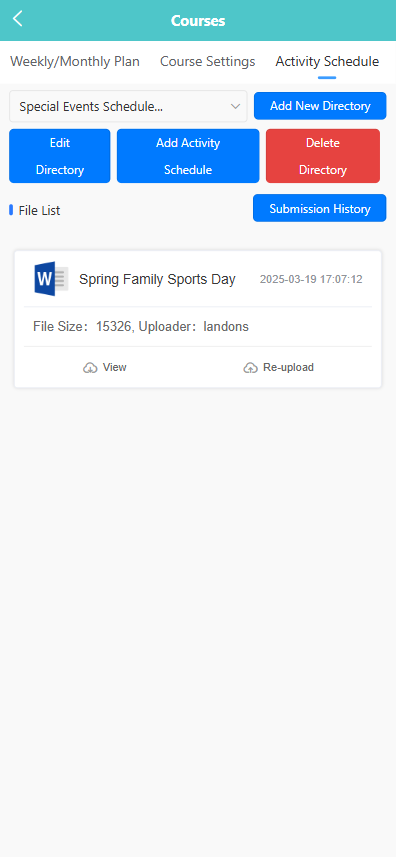
Use the dropdown menu at the top of the screen to select a schedule category:
-
Special Events Schedule
-
Outdoor & Physical Activity Schedule
-
Learning Area Schedule
-
Thematic Schedule
-
Weekly Schedule
-
Daily Schedule
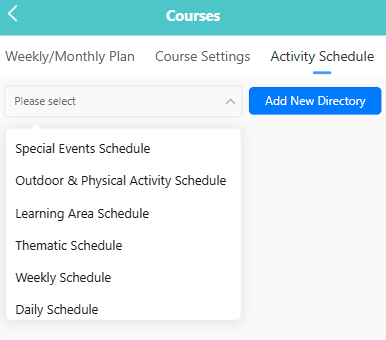
Once a category is selected, all directories under that category will be displayed. Click on a directory to view associated files.
➕ Creating a New Directory
-
Click the 【Add New Directory】 button.
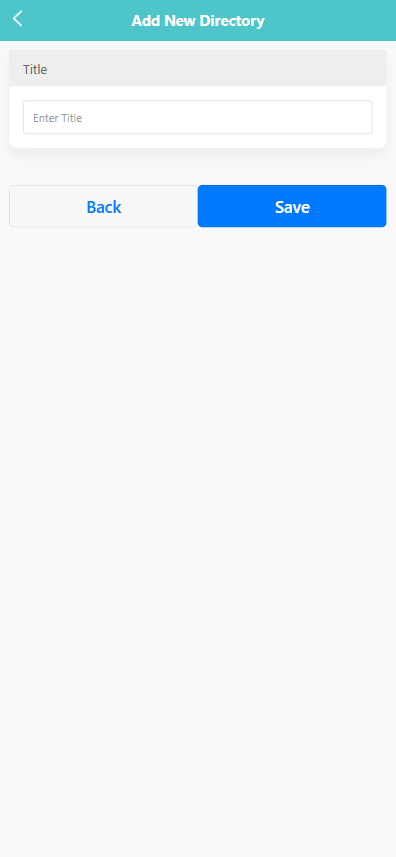
-
Enter a name for the directory in the “Title” field.
-
Click the 【Save】 button to create the directory.
✏️ Editing a Directory
-
Select a directory from the list.
-
Click the 【Edit Directory】 button.
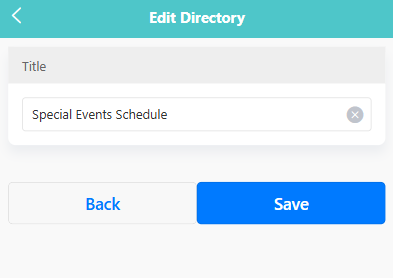
-
Modify the title as needed.
-
Click 【Save】 to apply changes.
🗑️ Deleting a Directory
- Select the directory you want to remove.
- Click the 【Delete Directory】 button.
- In the confirmation prompt, click 【OK】 to confirm or 【Cancel】 to abort.
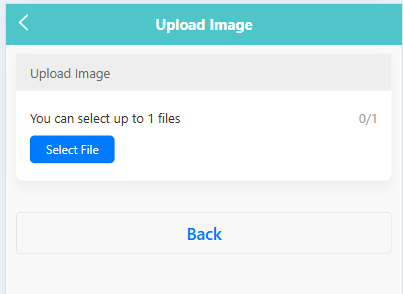
📎 Uploading an Activity Schedule
-
Click the 【Add Activity Schedule】 button.
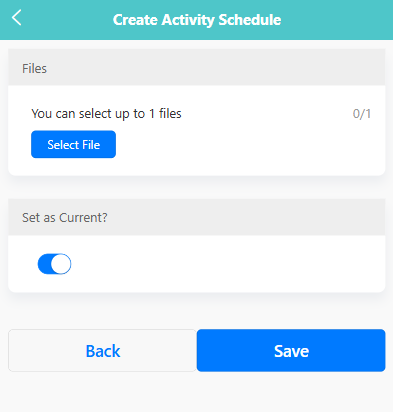
-
Click 【Select File】 to upload a document (maximum 1 file).
-
Toggle the switch to indicate if the file should be set as “Current”.
-
Click 【Save】 to complete the upload.
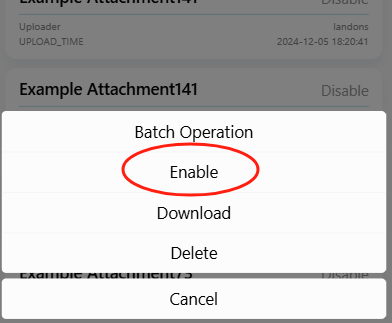
📜 Viewing Submission History
-
Click the 【Submission History】 button.
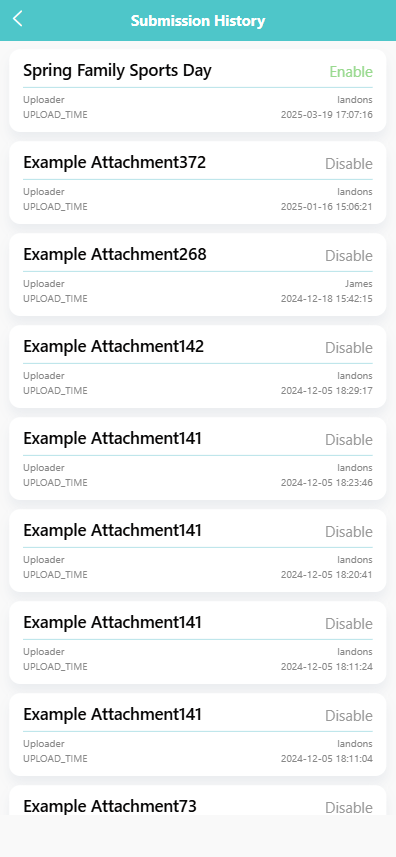
-
A list of previously uploaded files will appear.
-
Click 【Enable】 or 【Disable】 to manage the visibility of each file.
Course Setup
The Course Settings tab allows administrators to manage the list of available courses, including creating new courses, modifying existing ones, and removing outdated entries. Each course contains detailed information such as the academic year, term, instructor, duration, and fees.
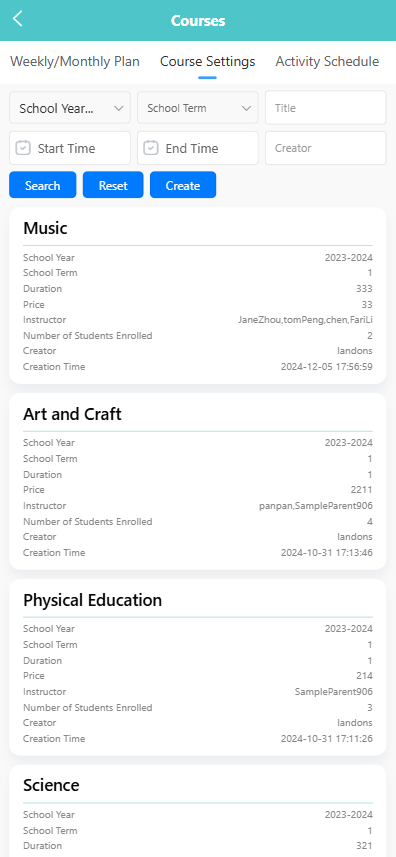
🔍 Searching for Courses
Use the filter bar at the top of the screen to search by:
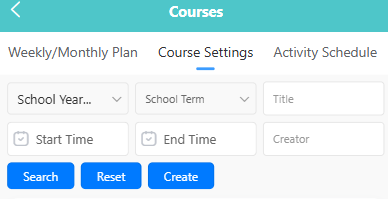
- School Year
- School Term
- Title
- Start Time / End Time
- Creator
- Fill in one or more fields to narrow the search.
- Click the 【Search】 button to view results.
- Click 【Reset】 to clear all filters.
➕ Creating a New Course
-
Click the 【Create】 button.
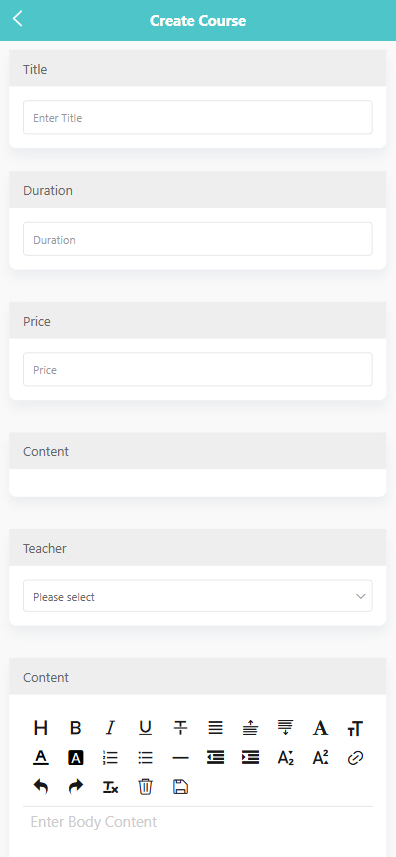
-
Complete the form with the following information:
- Title
- Duration
- Price
- Content (Course description)
- Teacher (Instructor assignment)
-
Click 【Save】 to finalize the new course.
✏️ Editing an Existing Course
-
Long press a course card to open the action menu.
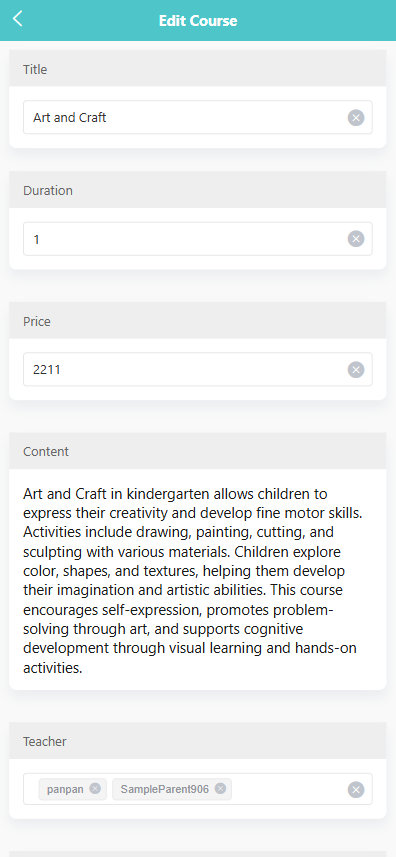
-
Tap 【Edit】.
-
Update the course details as needed.
-
Click 【Save】 to apply changes.
🗑️ Deleting a Course
-
Long press a course card to open the action menu.
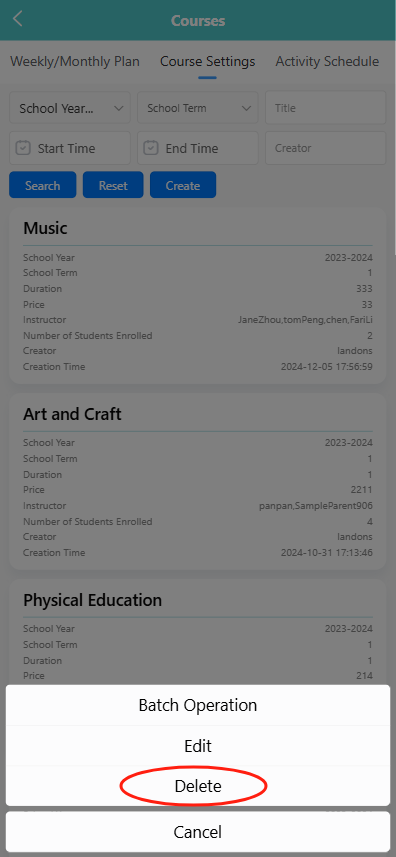
-
Tap 【Delete】.
-
A system prompt will appear: “Are you sure you want to delete the course?”
-
Click 【OK】 to confirm deletion, or 【Cancel】 to abort.
🧩 Batch Operation
- Long press a course card to open the action menu.
- Tap 【Batch Operation】 to enter selection mode.
- Select one or more courses from the list.
- Use the 【Delete】 button to remove selected courses in bulk.
Weekly/Monthly Plan
The Weekly/Monthly Plan section allows teachers or administrators to create, view, and manage weekly or monthly work plans for each semester.

🔍 Searching for Plans Use the filter bar at the top of the screen to search by:
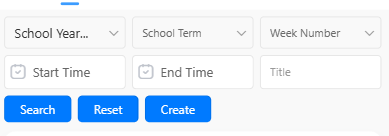
- School Year
- School Term
- Week Number
- Title
- Start Time
- End Time
Click the 【Search】 button to view matching records. Click 【Reset】 to clear all filters.
➕ Creating a New Weekly Plan
-
Click the 【Create】 button.
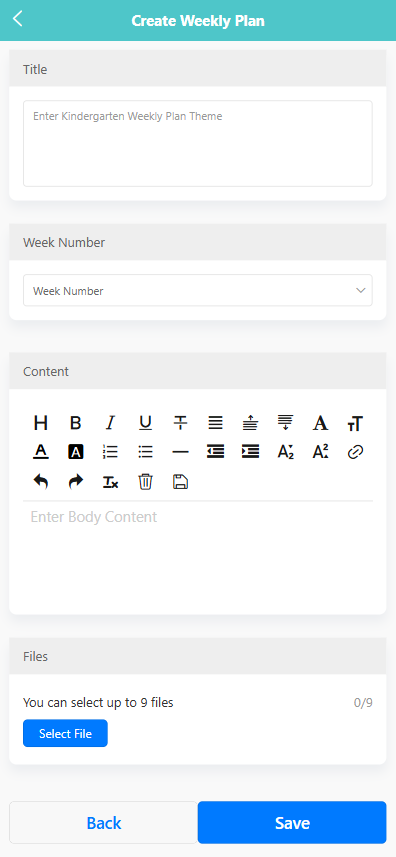
-
Complete the form with the following information:
- Title: Enter the theme of the weekly plan.
- Week Number: Select the week number.
- Content: Enter the plan content using the rich text editor.
- Files: Click 【Select File】 to upload up to 9 files as attachments.
-
Click 【Save】 to complete the creation.
✏️ Editing a Weekly Plan
-
Long press the target item in the plan list to open the function menu.

-
Tap 【Edit】.
-
On the edit page, update the title, week number, content, or file attachments as needed.
-
Click 【Save】 to confirm changes.
🗑️ Deleting a Weekly Plan
-
Long press the plan item to open the function menu.
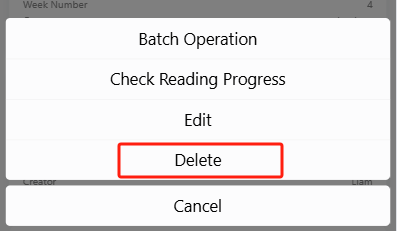
-
Tap 【Delete】.
-
A system prompt will appear: “Are you sure you want to delete?”
-
Click 【OK】 to confirm and delete the plan.
📦 Batch Operation
- Long press any plan and tap 【Batch Operation】 from the popup menu.
- Select multiple records using the checkboxes.
- Click the 【Delete】 button at the top.
- Confirm the system prompt to remove the selected plans.
📖 Checking Reading Progress
-
Long press the target plan and tap 【Check Reading Progress】.
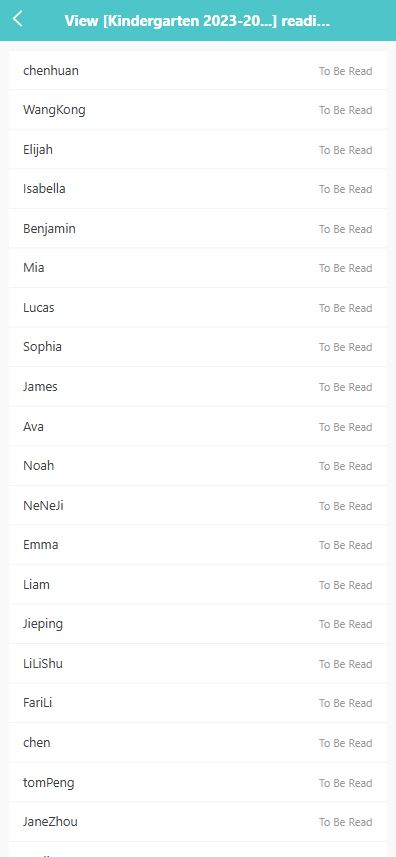
-
The system will display a list of users and their reading status:
- Read
- To Be Read
Approve Admission
The Approve Enrollment section allows administrators to review and manage individual children's enrollment applications, assign admission statuses, and trigger SMS notifications. Administrators can also view or modify detailed enrollment information.
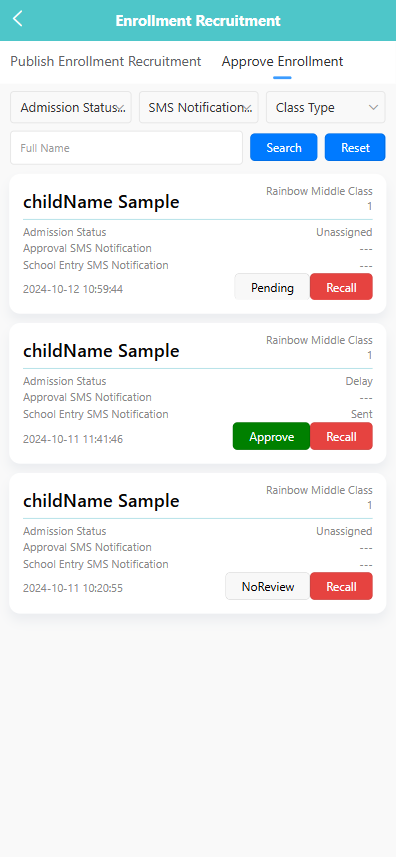
🔍 Filtering Enrollment Applications
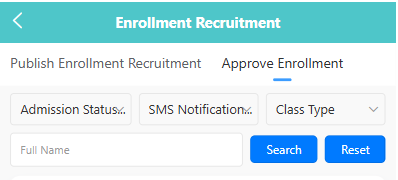
- Use the filter bar at the top to narrow down records by:
- Admission Status: Normal, Delay, Unassigned
- SMS Notification: Sent, Not Sent
- Class Type: Small, Middle, Kindergarten, Nursery
- Full Name
- Click the 【Search】 button to apply the filters. Click 【Reset】 to clear all filters.
📨 Sending or Recalling SMS Notifications
Once a child’s admission is approved, a “Sent” label appears under “SMS Notification”.
🧾 Viewing and Editing Enrollment Details
-
Tap on a child’s card to open their enrollment details.
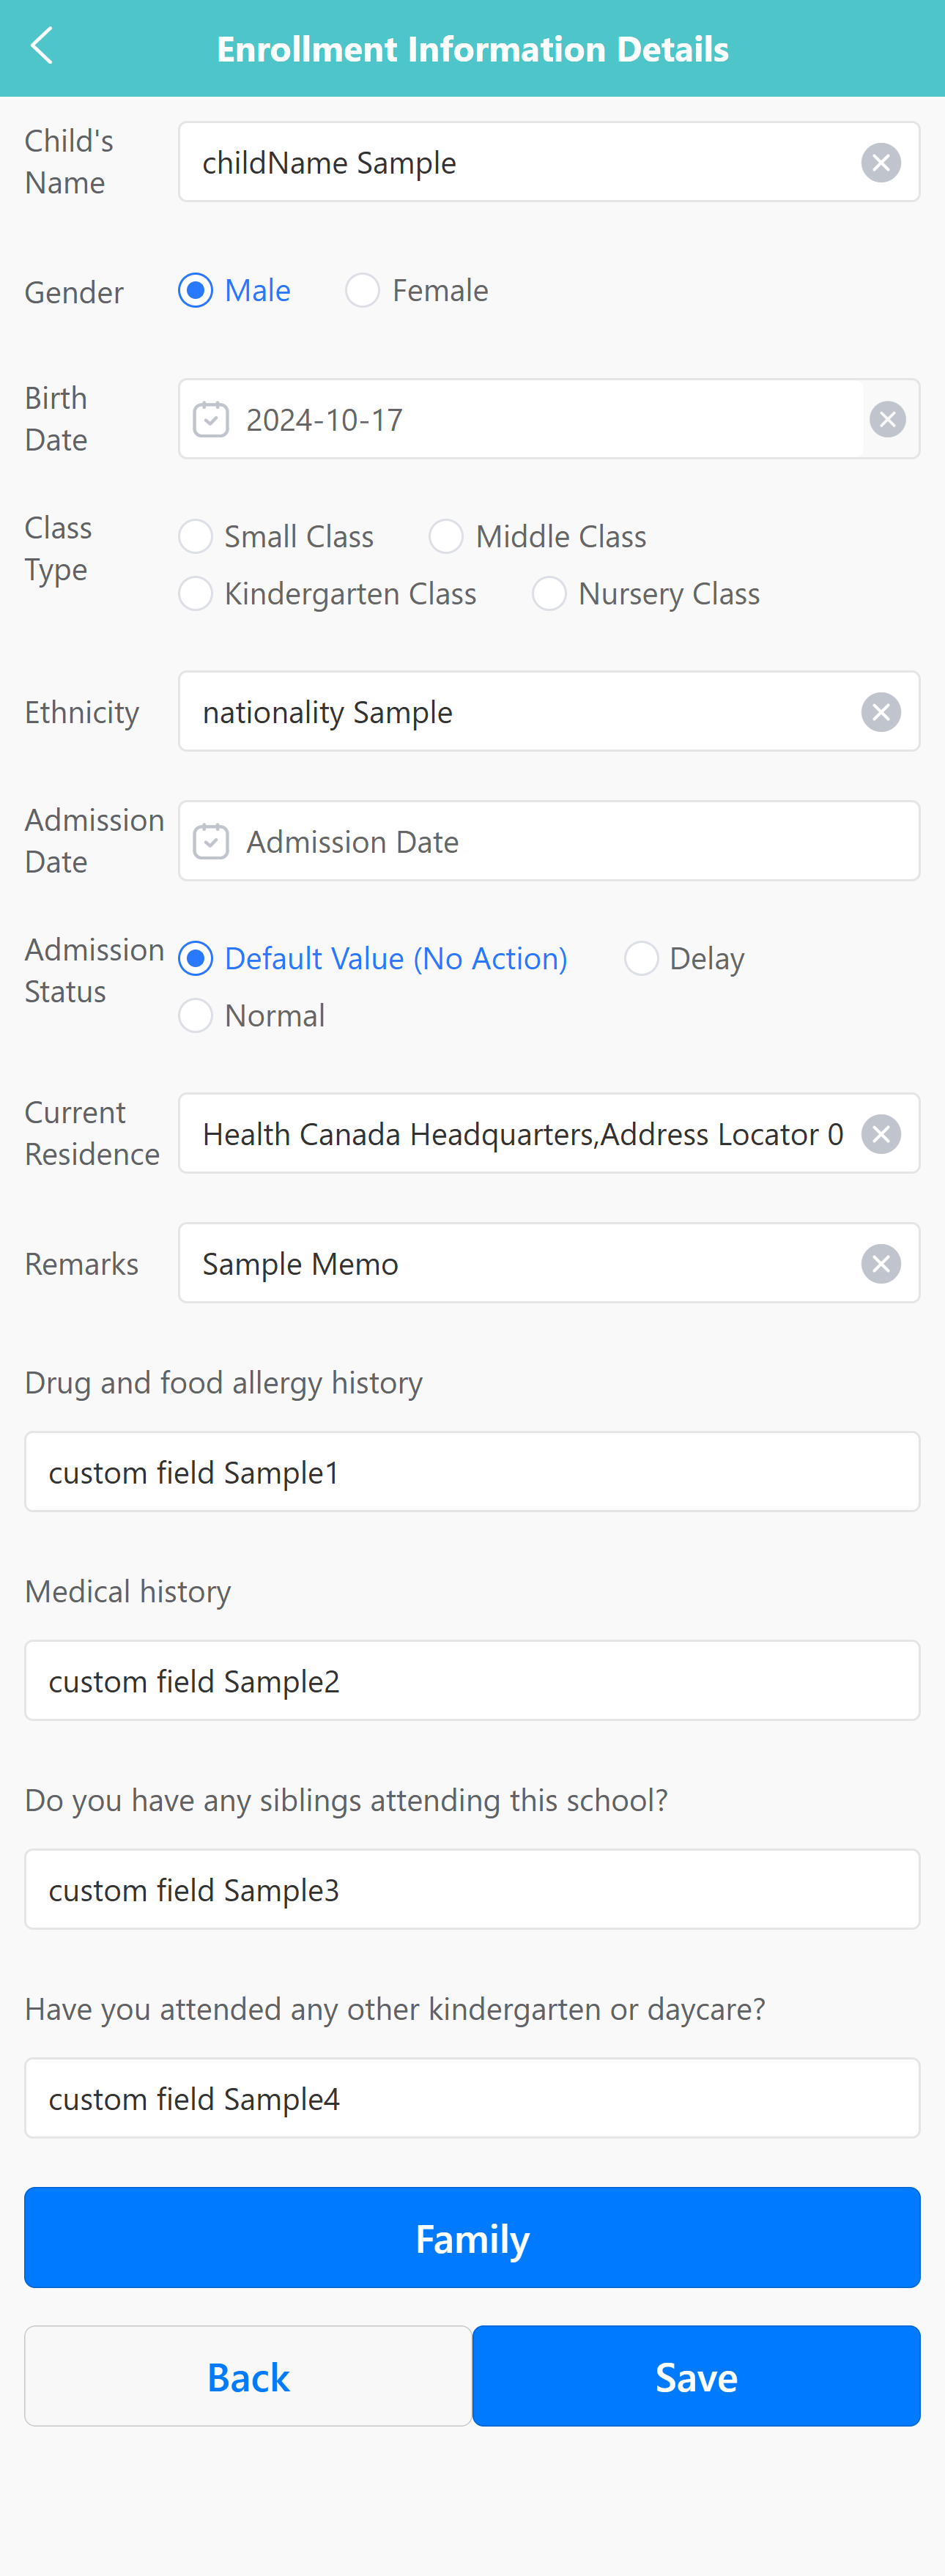
-
Review or edit the following fields:
- Child’s Name, Gender, Birth Date, Class Type, Ethnicity
- Admission Date & Status
- Current Residence, Remarks
- Drug/Food Allergies, Medical History, Other kindergarten attendance
-
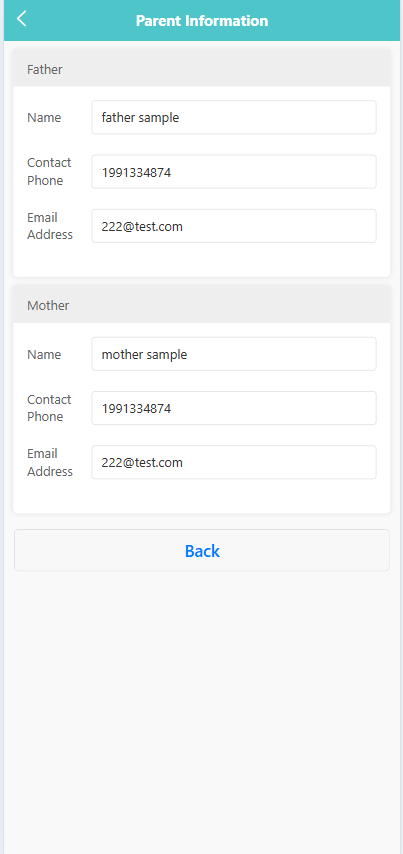
Tap the 【Family】 button to enter parent/guardian contact details.
-
Click 【Save】 to confirm the updates.
👥 Batch Operations
-
Long-press on a child’s record to enable batch mode.

-
Select multiple entries and use available options:
- 【Batch Export】
- 【Generate User】
- 【Delete】
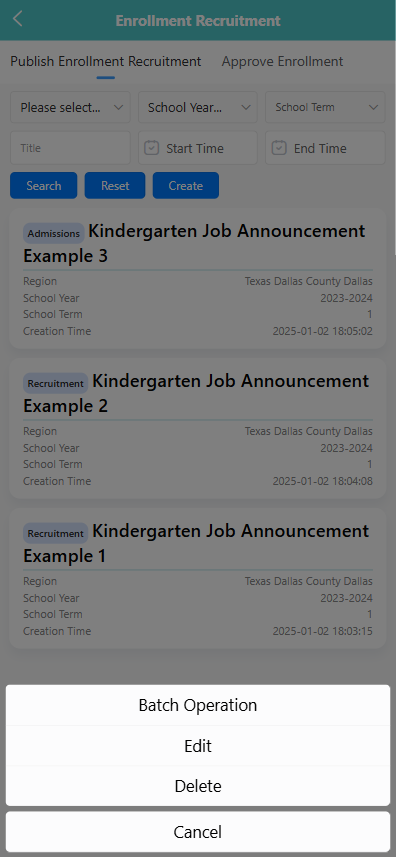
Publish Enrollment and Recruitment Information
The Publish Enrollment Recruitment section allows administrators to post announcements for admissions or staff recruitment, including job descriptions and relevant files. These announcements are visible under the appropriate category for parents or job seekers.
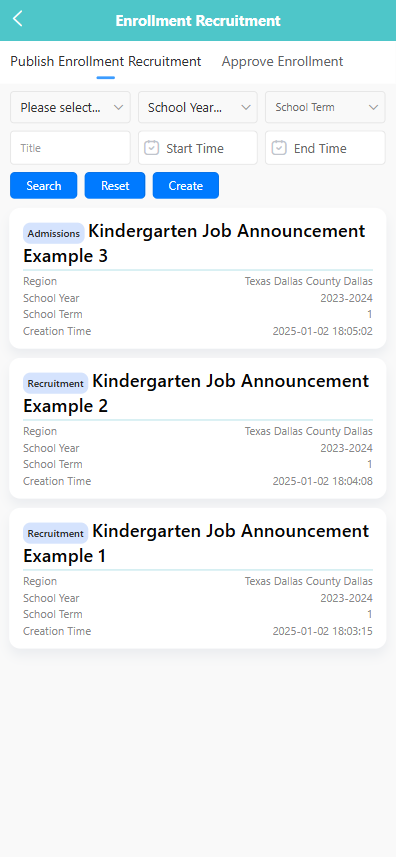
🔍 Searching for Announcements
Use the filter bar at the top of the screen to search by:
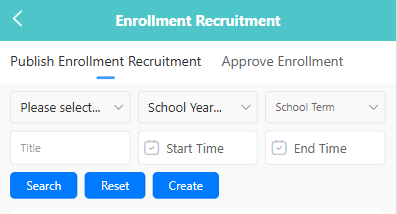
- Region
- School Year
- School Term
- Title
- Start Time / End Time
- Select filters as needed.
- Click the 【Search】 button to view matching announcements.
- Click 【Reset】 to clear all filters.
➕ Creating a New Announcement
-
Click the 【Create】 button.
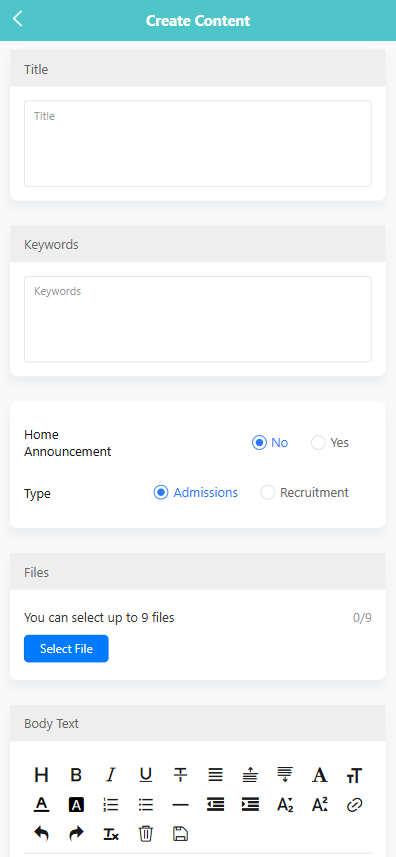
-
Fill in the form with the following fields:
- Title: Enter the announcement title.
- Keywords: Add search tags for easier lookup.
- Home Announcement: Select whether to feature it on the home page.
- Type: Choose either “Admissions” or “Recruitment”.
- Files: Upload up to 9 files (e.g., PDFs, images).
- Body Text: Use the editor to write detailed content.
-
Click 【Save】 to publish the announcement.
✏️ Editing an Existing Announcement
-
Long-press the announcement entry to trigger the options menu.
-
Select 【Edit】.
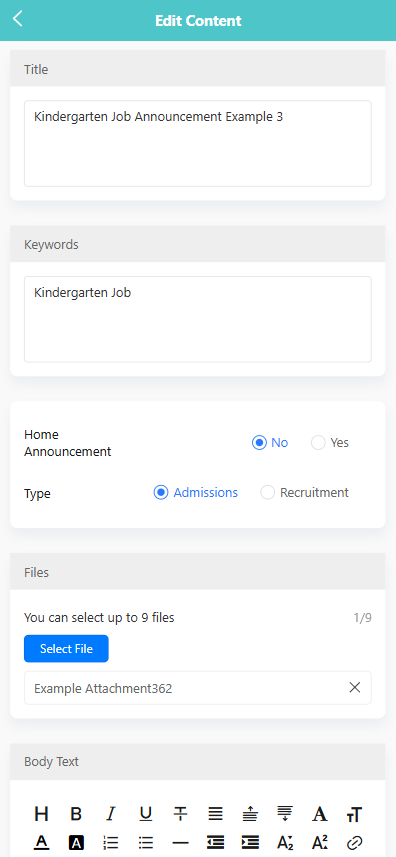
-
Update any of the following fields:
- Title
- Keywords
- Announcement type
- Content or files
-
Click 【Save】 to confirm the changes.
🗑️ Deleting an Announcement
-
Long-press the announcement entry to trigger the options menu.
-
Select 【Delete】.
-
Confirm the action in the pop-up dialog by clicking 【OK】.
🔄 Batch Operation
- Long-press to select multiple announcements.
- Click 【Batch Operation】 to apply actions such as delete or edit to multiple entries at once.
📄 Viewing Announcement Details
- Tap any announcement card to open its details.
- The view includes:
- Title and keywords
- Announcement type
- Uploaded files
- Full announcement body text
This feature helps users preview the full content of each post, including attachments such as job descriptions or enrollment brochures.
Damage Records
The Damage Records section allows staff to view and manage reports of equipment that has been damaged. This helps administrators track damaged items, follow up on necessary actions, and maintain inventory accuracy.
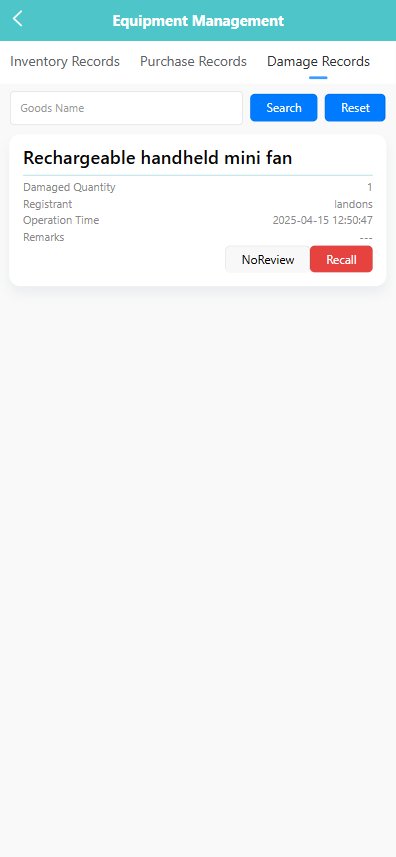
🧾 Viewing Damage Records
- Navigate to the 【Damage Records】 tab in the Equipment Management module.
- Use the search bar to filter records by Goods Name, if needed.
- Each entry displays the following information:
- Item Name
- Damaged Quantity
- Registrant (person who reported the damage)
- Operation Time (date and time the damage was reported)
- Remarks (if any)
- Items that have not been reviewed are marked as 【NoReview】.
- To cancel a damage report, click the 【Recall】 button.
Inventory Management
The Inventory Records tab allows staff to manage preschool equipment by category, track quantities, and handle operations such as borrowing, returning, editing, or restocking. Only teaching and support staff have access to this module.
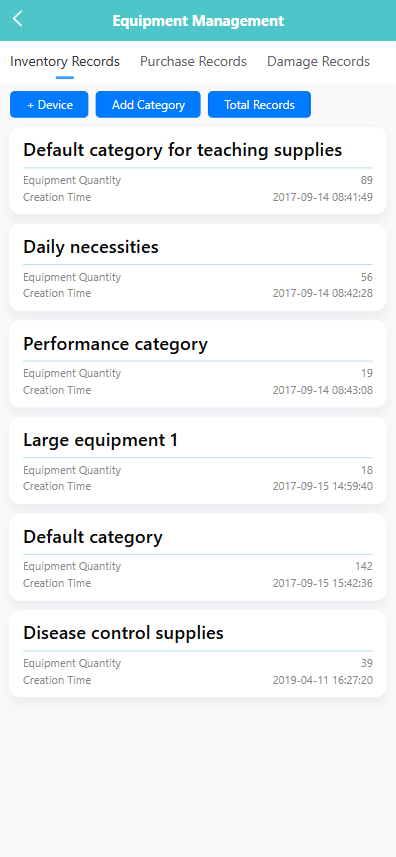
🔍 Searching for Equipment by Category
-
On the Inventory Records screen, view all equipment grouped by category.
-
Each entry displays the equipment quantity and creation time for that category.
-
Tap any category card to view detailed equipment within that category.
🆕 Adding a New Equipment Item
-
Tap the 【+ Device】 button.

-
Fill in the equipment details including:
- Equipment Name
- Category (Teaching Staff / Support Staff / Office Work)
- Quantity
- Unit Price
- Supplier
-
The system will automatically calculate the total price.
-
Tap 【Save】 to finish.
🗂 Creating a New Category
-
Tap the 【Add Category】 button.
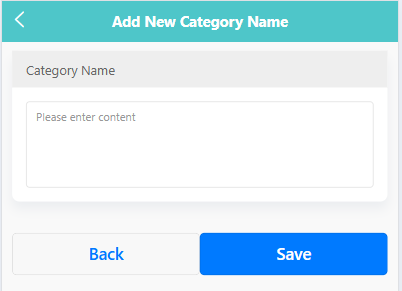
-
Enter the new category name.
-
Tap 【Save】 to confirm.
📊 Viewing Total Records
-
Tap the 【Total Records】 button.
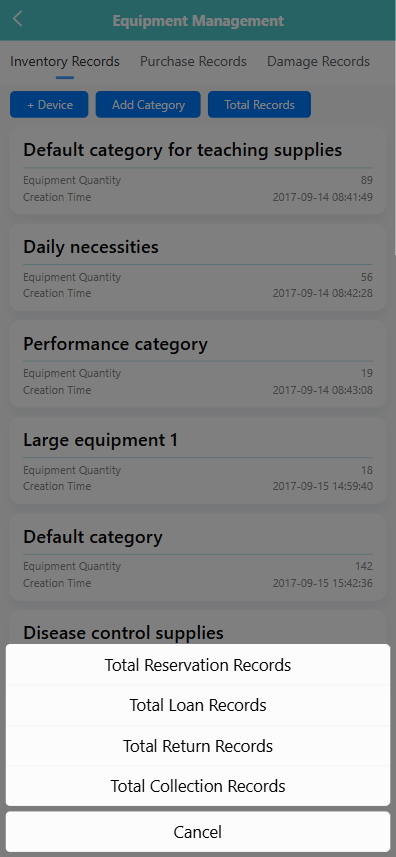
-
A menu will appear with the following options:
- Total Reservation Records
- Total Loan Records
- Total Return Records
- Total Collection Records
-
Tap any option to view historical equipment usage data.
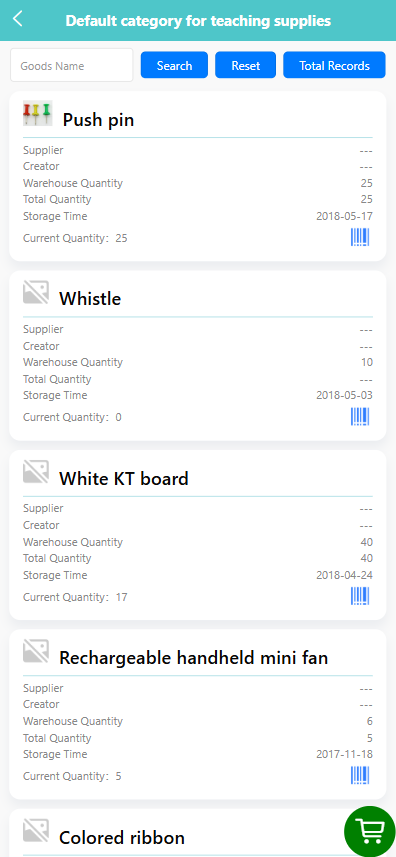
📦 Viewing Equipment Items in a Category
-
Tap a category card to see the equipment list within it.
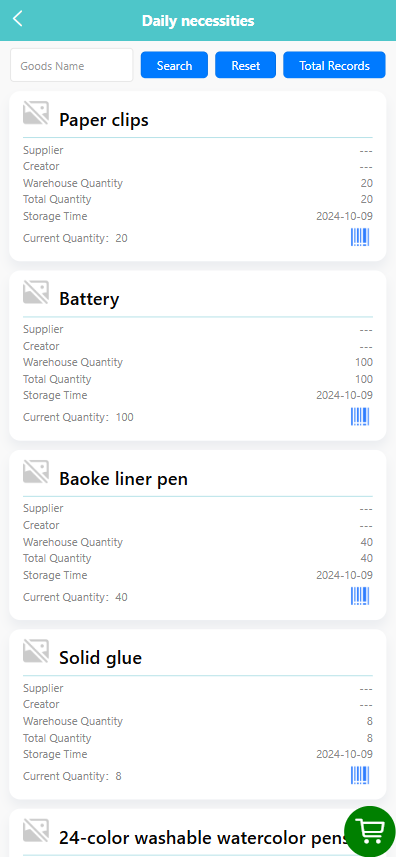
-
Each item card shows:
- Supplier
- Creator
- Warehouse Quantity / Total Quantity / Current Quantity
- Storage Time
-
Use the filter bar to search by equipment name. Tap 【Search】 or 【Reset】 as needed.
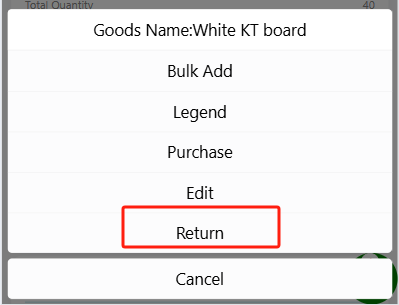
🛠 Performing Actions on an Equipment Item
-
Long-press an item to open the pop-up menu.
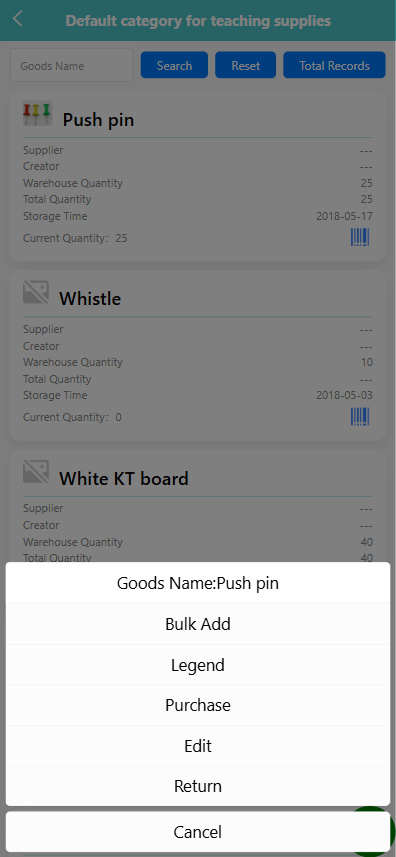
-
Select one of the following options:
-
Edit: Modify the item’s basic details.
-
Bulk Add: Add to the cart in the bottom right corner in bulk.
-
Legend: Modify the sample image of the item
-
Purchase: Increase the new inventory quantity.
-
Return: Return the previously borrowed quantity.
-
➕ Add to the cart in the bottom right corner in bulk
-
Long-press the item and select Bulk Add.
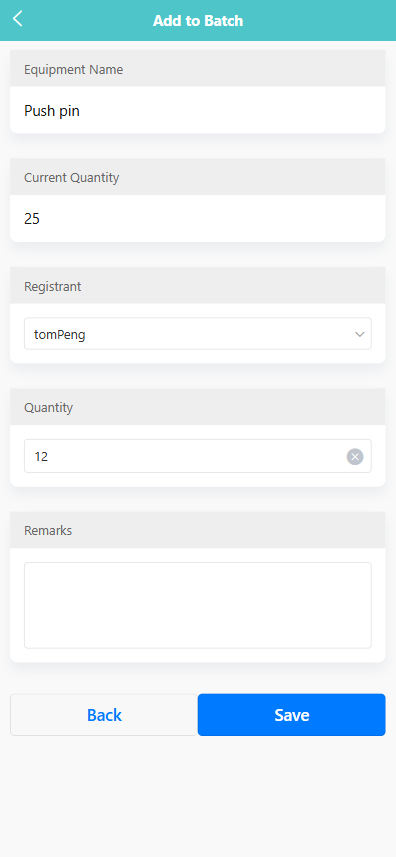
-
The system displays the current quantity.
-
Select a registrant and enter the quantity.
-
Optionally, add remarks.
-
Tap 【Save】 to confirm.
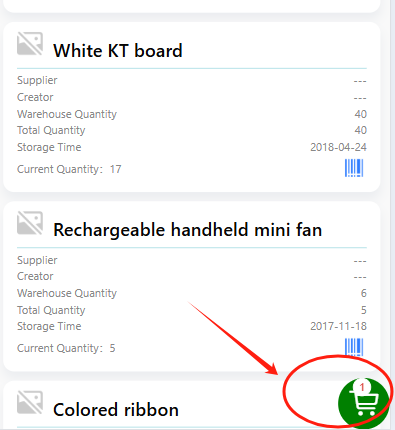
🛒 Borrowing Equipment via the Cart
-
Tap the green cart icon next to an equipment item to add it to the cart.

-
After selecting all desired items, tap the floating green cart icon in the bottom right corner.
-
Choose the operation type (e.g., Borrow,Scrapped).
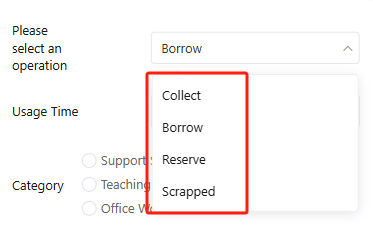
-
Select usage time, category, and confirm item quantity and registrant.
-
Optionally, add remarks.
-
Tap 【Save】 to complete the borrowing request.
🔁 Returning Items
-
Long press on the item you wish to return.
-
In the pop-up menu, select the 【Return】 option.
-
On the Return Items screen, complete the following fields:
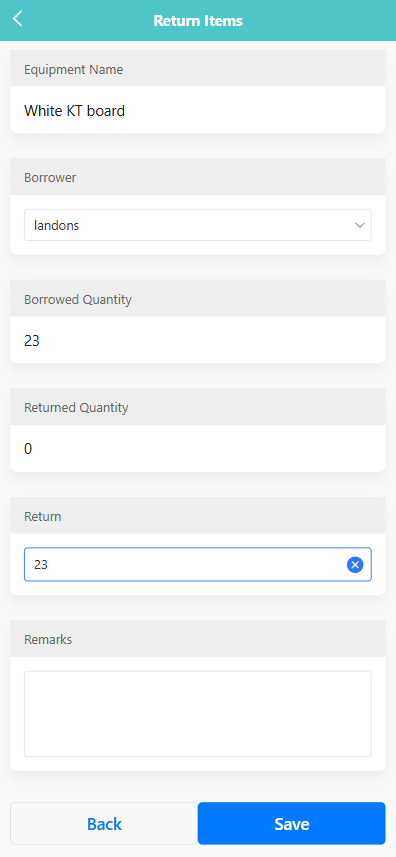
- Borrower: Select the staff member who borrowed the item.
- Borrowed Quantity: Displays the total quantity previously borrowed.
- Returned Quantity: Displays how many items have already been returned.
- Return: Enter the quantity being returned in this operation.
- Remarks: (Optional) Add any notes related to the return.
-
Click the 【Save】 button to confirm and update the return record.
🔍 Viewing Reservation Records
-
Click on the 【Total Records】 button from the Inventory Records page and select Total Reservation Records.
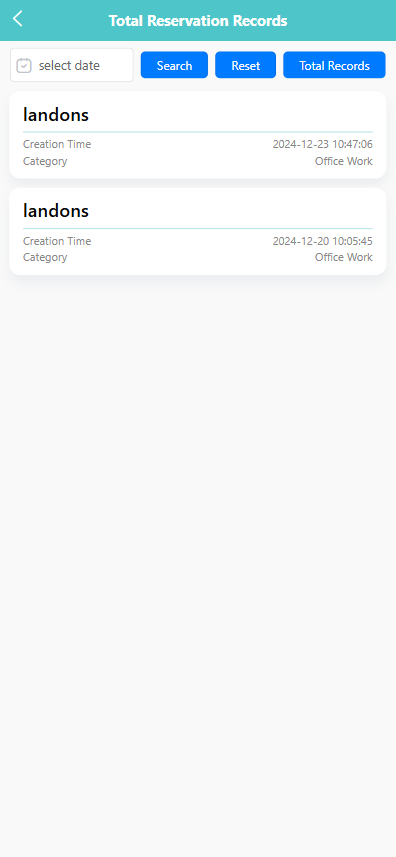
-
Use the date selector to filter by reservation date, then click 【Search】.
-
View a list of all reservations, including:
- Registrant Name
- Creation Time
- Category
📥 Viewing Loan Records
-
Click on the 【Total Records】 button and select Total Loan Records.
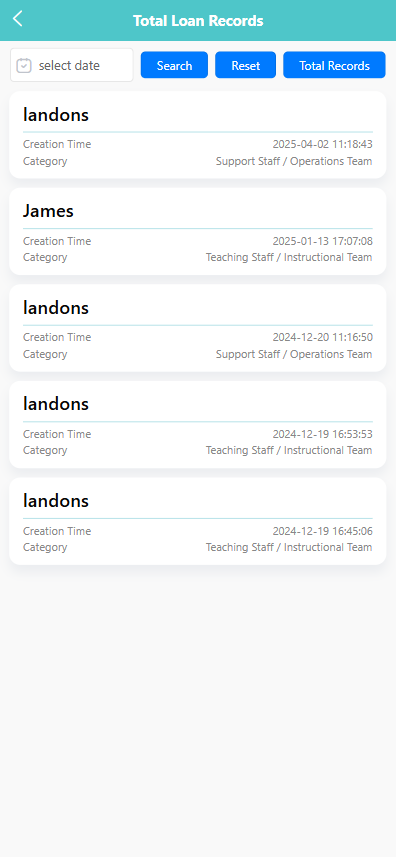
-
Use the date selector to search by loan date.
-
The list will show each loan record, including:
- Registrant
- Category (e.g., Support Staff / Instructional Team)
- Creation Time
📤 Viewing Return Records
-
Click on the 【Total Records】 button and select Total Return Records.
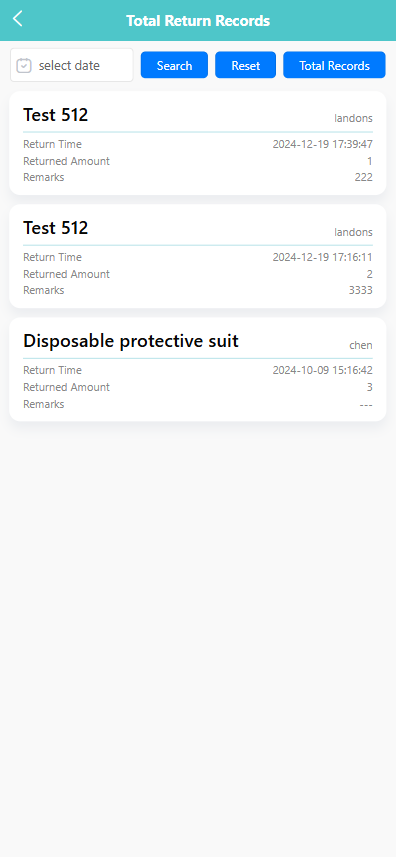
-
Filter records by selecting a return date.
-
The returned items will show:
- Item Name
- Registrant
- Return Time
- Returned Quantity
- Remarks
📦 Viewing Collection Records
-
Click on the 【Total Records】 button and choose Total Collection Records.
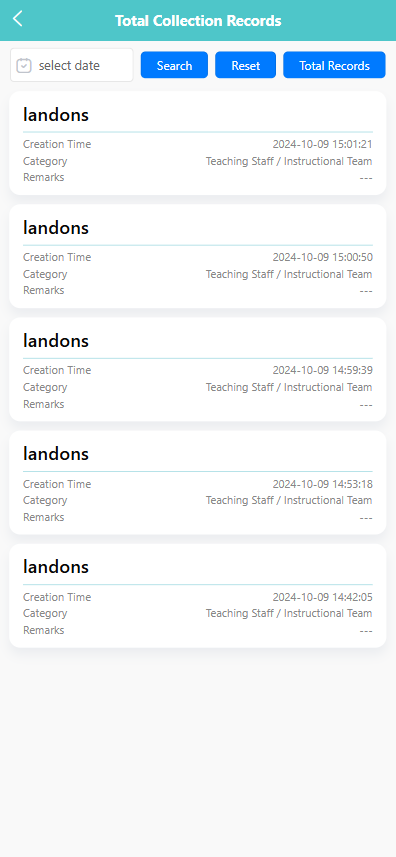
-
Use the date selector and click 【Search】 to narrow down records.
-
The records display:
- Registrant
- Category
- Creation Time
- Remarks (if any)
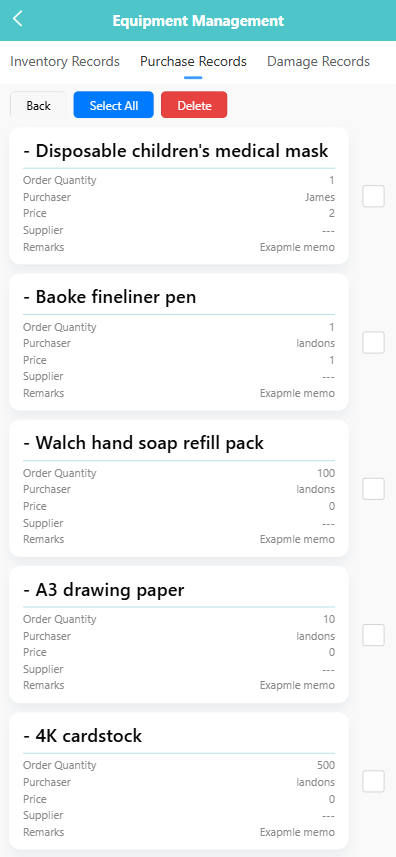
Purchase Records
This module allows staff to manage and track procurement records for various equipment and supplies used in the preschool. Users can view purchase details, perform batch operations, and manage approval status.
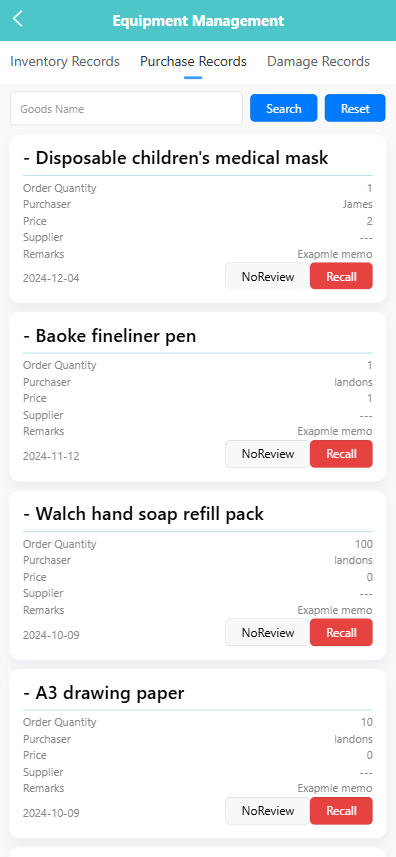
✅ 1. View Purchase Records
Users can browse all equipment purchase records, including item name, quantity, purchaser, unit price, supplier, remarks, and order date. Each item shows its review status (e.g., “NoReview”) and provides a 【Recall】 button for withdrawing submissions when needed.
🛠 2. Batch Operation
To perform a batch action:
-
Long-press a record to bring up the pop-up menu.
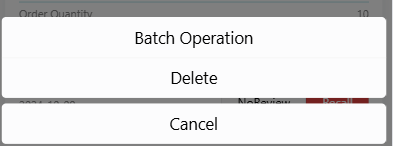
-
Tap 【Batch Operation】 to enter selection mode.
-
Select one or more records using the checkboxes.
-
Tap 【Delete】 to remove selected entries.
Use 【Select All】 to quickly select every item in the list.
🗑 3. Delete Purchase Record
To delete a single record:
- Long-press the target item.
- In the pop-up menu, tap 【Delete】.
- Confirm the deletion in the system prompt if applicable.
⚠️ Deleting purchase records is irreversible and should be used with caution.
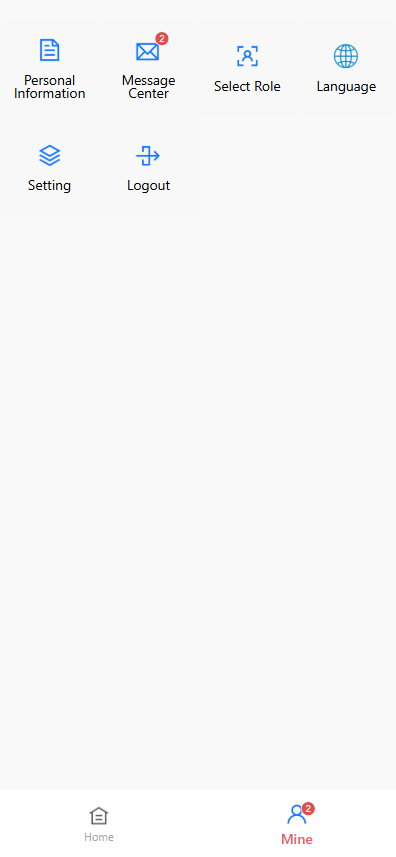
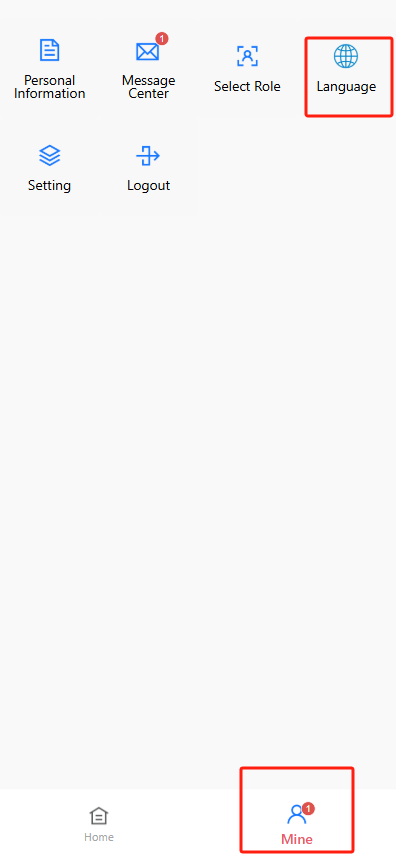
Mine Page
The 【Mine】 section provides access to user-specific tools and preferences.
📄 Personal Information
Tap to view and update your basic profile details such as name, phone number, and email address.
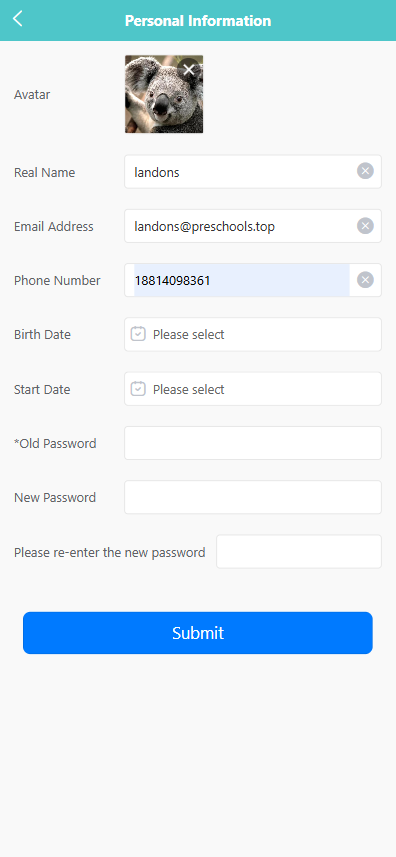
Edit Basic Information
On the 【Personal Information】 page, you can edit the following fields:
- Real Name
- Email Address
- Phone Number
- Birth Date
- Start Date
Tap on any editable field to update the information.
Change Avatar
Tap the current avatar at the top of the screen to upload or update your profile picture.
Change Password
To change your password, enter the current password in the 【Old Password】 field, then input your new password in the 【New Password】 field. Confirm the change by entering the same new password in the 【Please re-enter the new password】 field. Tap the 【Submit】 button to save the new password.
Submit Changes
After updating your profile information or password, tap the 【Submit】 button at the bottom of the screen to save changes.
System will display a confirmation prompt or error message depending on input validity.
Contact Us
Tap 【Contact Us】 to view school contact information or send inquiries.

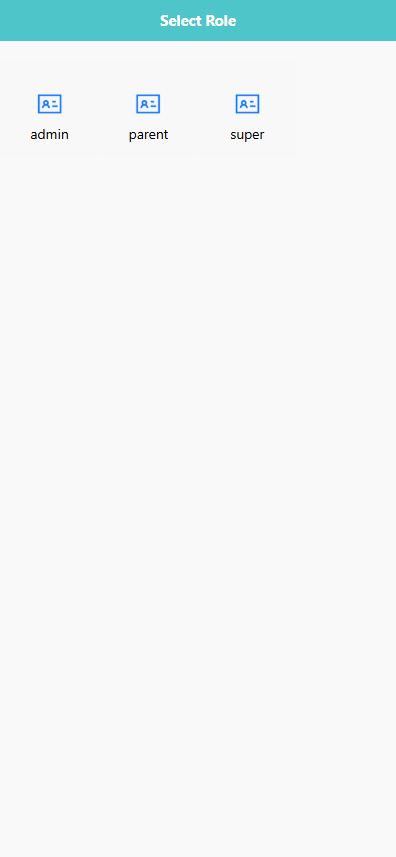
🔄 Select Role
Switch between roles if your account is assigned to more than one (e.g., teacher and parent).
🌐 Language
Change the language used throughout the application interface.
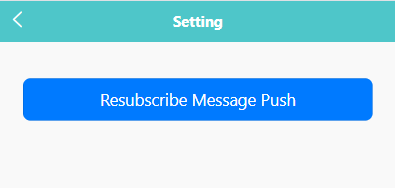
⚙️ Setting
Manage personal app settings.
Tap 【Setting】 to open the settings page.
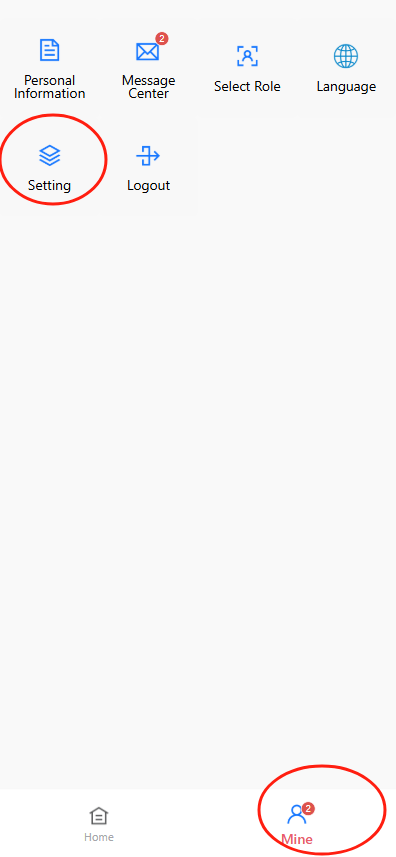
Click 【Resubscribe Message Push】 if you previously unsubscribed from push notifications and want to receive them again.
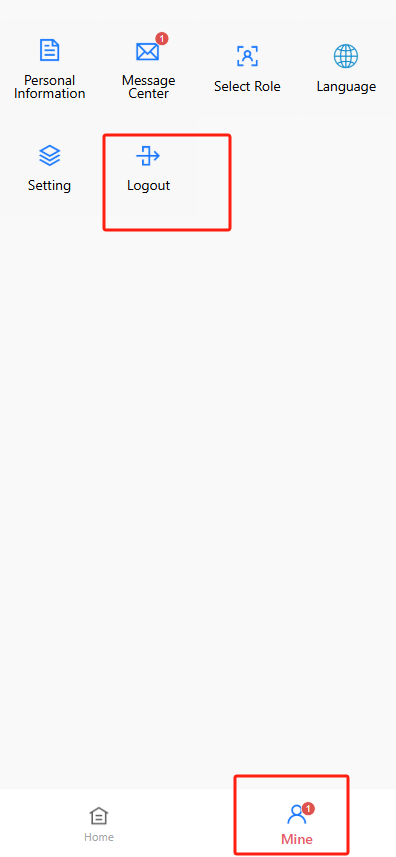
🔓 Logout
Tap 【Logout】 to safely sign out of your account.
Child Management
The Child tab allows administrators to manage the basic profiles, class assignments, course enrollments, and other key information for each child enrolled in the preschool.
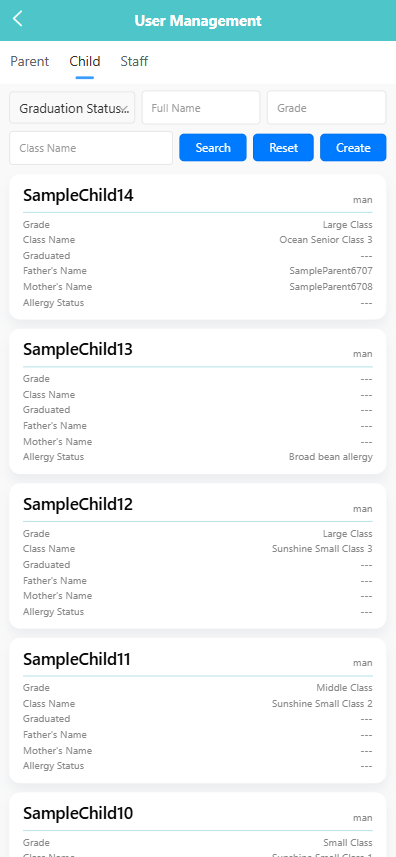
🔍 Searching for Children
Use the filter bar at the top of the screen to search by:
- Graduation Status
- Full Name
- Grade
- Class Name
Click the 【Search】 button to view matching records. Click 【Reset】 to clear all filters.
➕ Creating a New Child Record
-
Click the 【Create】 button.
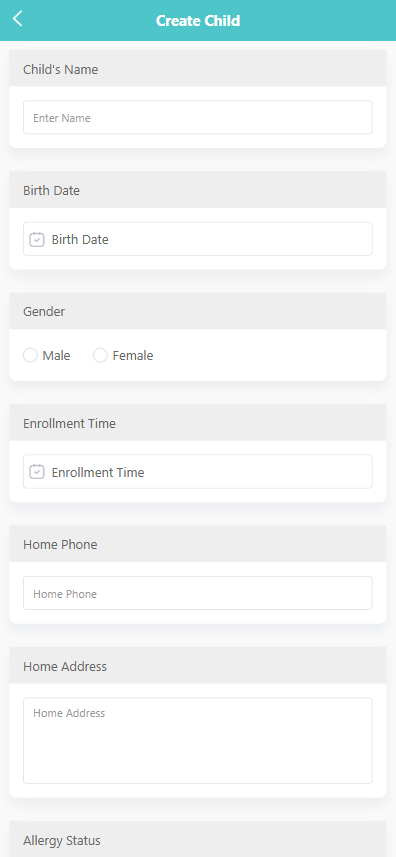
-
Complete the form with the following information:
- Child’s Name
- Birth Date
- Gender
- Enrollment Time
- Home Phone (optional)
- Home Address
- Allergy Status
-
Click 【Save】 to complete the registration, or 【Back】 to cancel.
🖊️ Editing Child Information
To edit an existing child profile:
-
Long press the child’s card to open the action menu.
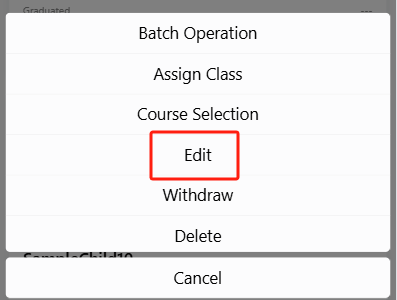
-
Tap 【Edit】.
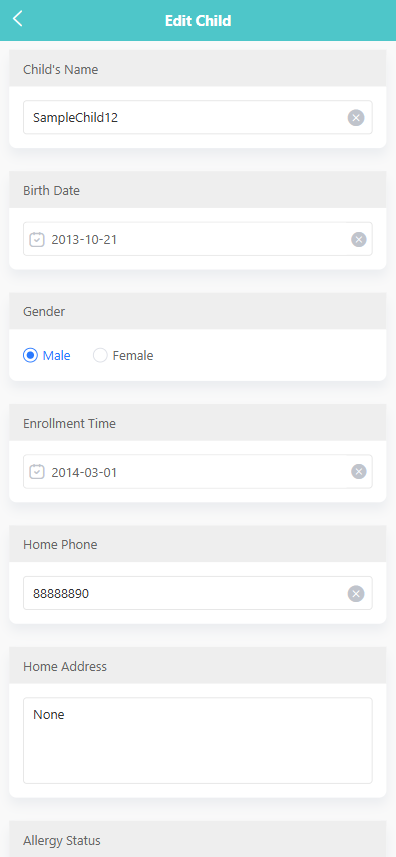
-
Make the necessary changes and click 【Save】.
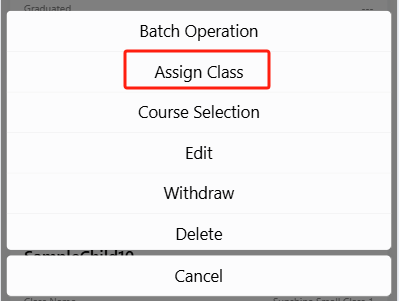
🏷️ Assigning a Class
To assign a child to a class:
-
Long press the child’s record and tap 【Assign Class】.
-
Choose the appropriate class from the list.
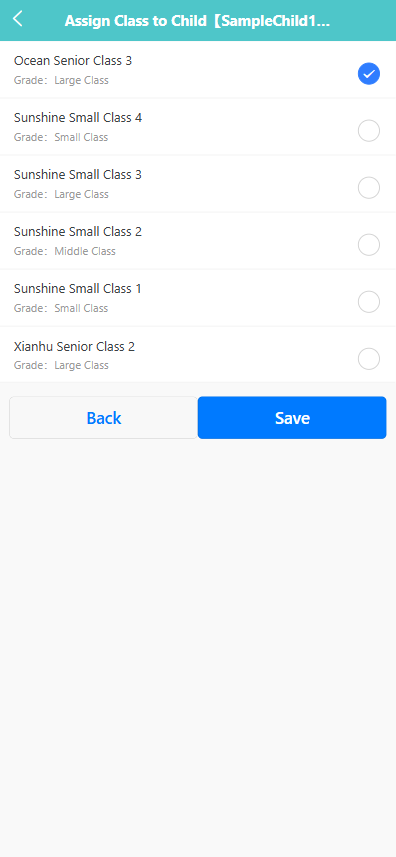
-
Click 【Save】 to confirm.
📚 Selecting Courses
To enroll a child in specific courses:
-
Long press the child’s card and choose 【Course Selection】.
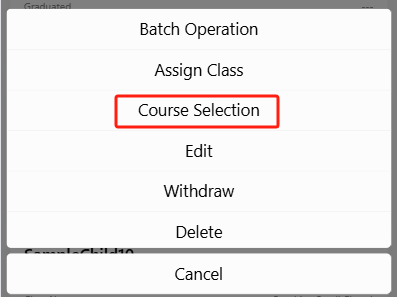
-
Check or uncheck the desired subjects (e.g., Music, Science).
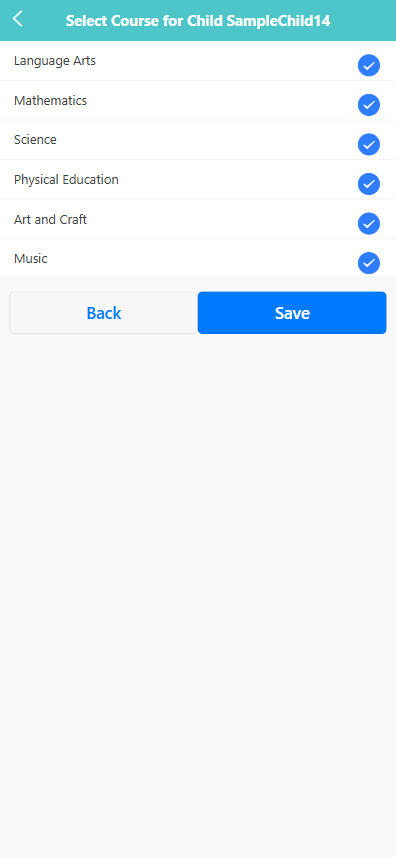
-
Click 【Save】 to apply the changes.
🗃️ Withdrawing a Child
To withdraw a child:
-
Long press the child entry and select 【Withdraw】.
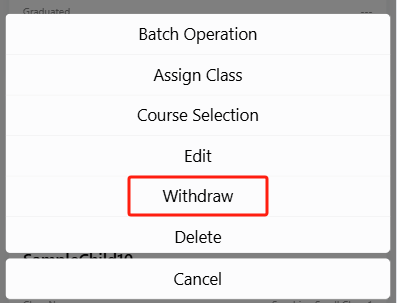
-
The system will prompt: “Are you sure you want to withdraw child [SampleChild14]?”
-
Click 【OK】 to confirm, or 【Cancel】 to abort.
🗑️ Deleting a Child Record
To permanently remove a child record:
-
Long press the child card and select 【Delete】.
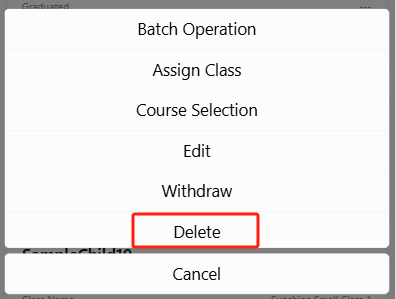
-
A confirmation will appear: “Are you sure you want to delete?”
-
Click 【OK】 to proceed, or 【Cancel】 to exit.
📦 Batch Operation
To manage multiple children:
- Long press any child card and tap 【Batch Operation】.
- Use the checkboxes to select entries.
- Tap 【Delete】 to remove selected records, or use 【Select All】 to mark all items at once.
Managing Pickup Persons for a Child
Each child can have one or more approved pickup persons. These individuals are authorized to pick up the child from the preschool. You can add, view, edit, or recall these records.
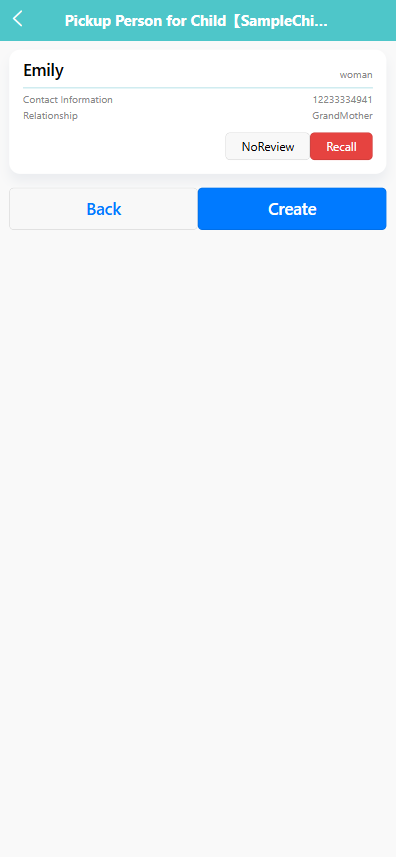
👀 Viewing Pickup Persons
- Tap a child’s record from the 【Child】 tab.
- On the next screen, you'll see a list of associated pickup persons, including:
- Name
- Gender
- Contact Information
- Relationship (e.g., Grandmother)
➕ Adding a Pickup Person
-
Click the 【Create】 button.
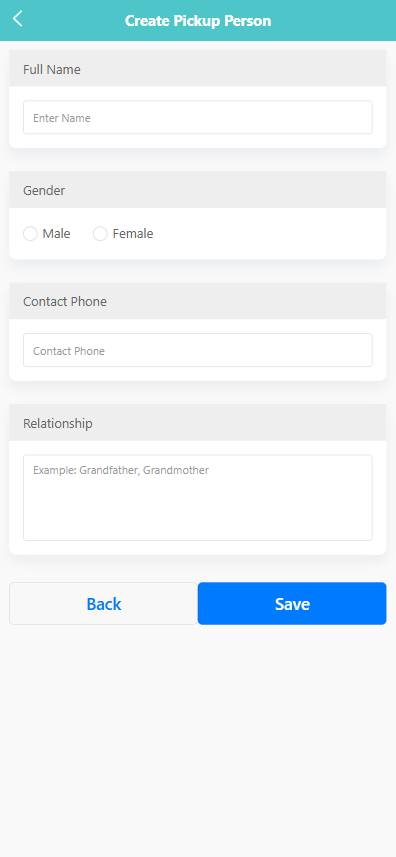
-
Fill in the following information:
- Full Name
- Gender
- Contact Phone
- Relationship (e.g., Grandfather, Babysitter)
-
Click 【Save】 to submit the new pickup person.
🖊️ Editing a Pickup Person
-
Tap the existing pickup person record to open the edit view.
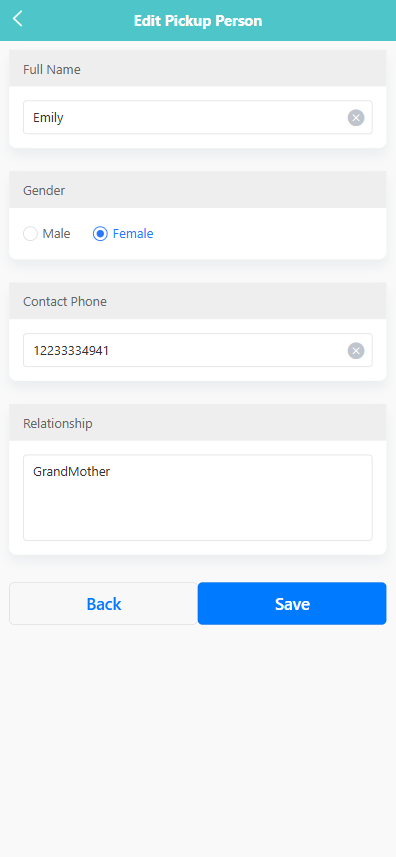
-
Modify the desired fields.
-
Click 【Save】 to update the information or 【Back】 to cancel.
🔁 Recalling a Pickup Person Record
If the pickup person’s record needs to be modified or reviewed again:
-
Tap the 【Recall】 button next to the corresponding entry.
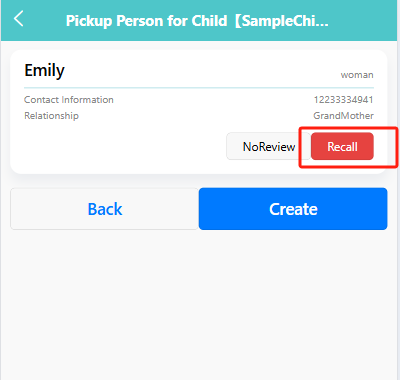
-
The status will be updated to allow for re-editing or review.
Parent Management
The Parent tab allows administrators to manage parent accounts and view their associated children, contact details, and app follow status.
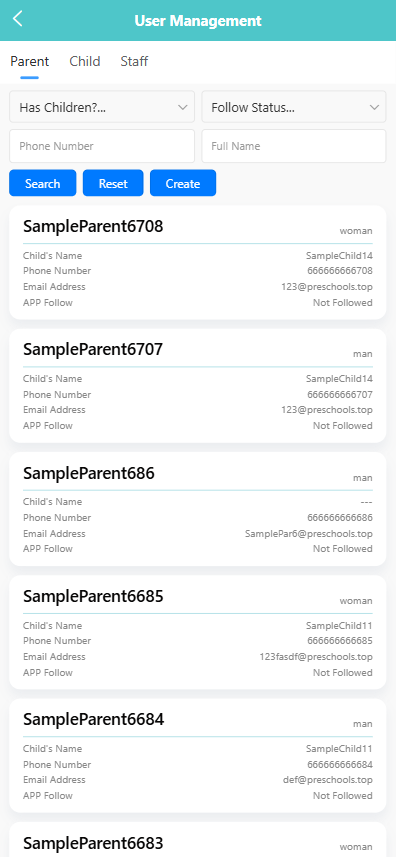
🔍 Searching for Parents
Use the filters at the top to narrow down results:
- Has Children? – Filter by whether the parent is linked to a child.
- Follow Status – Filter by app subscription status.
- Enter Phone Number or Full Name to search for specific users.
Click the 【Search】 button to view results. Use 【Reset】 to clear all filters.
➕ Creating a Parent Account
-
Click the 【Create】 button.
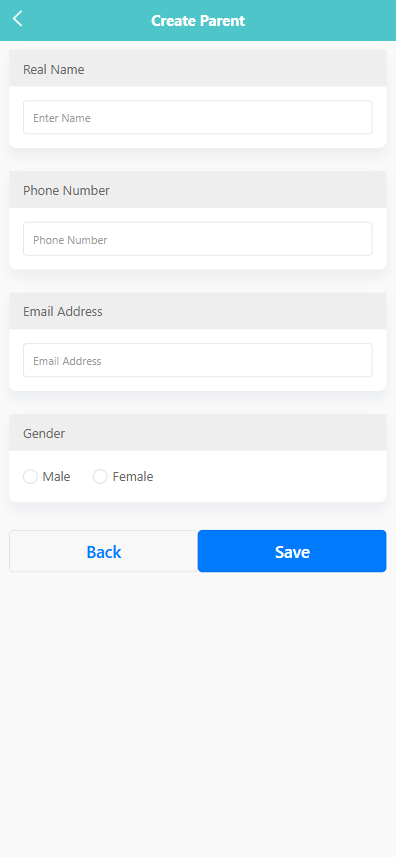
-
Fill in the required fields:
- Real Name
- Phone Number
- Email Address
- Gender
-
Click 【Save】 to create the parent profile or 【Back】 to return without saving.
➕ Adding a Child for a Parent
To assign a child to a parent:
-
Long press a parent record to open the action menu.
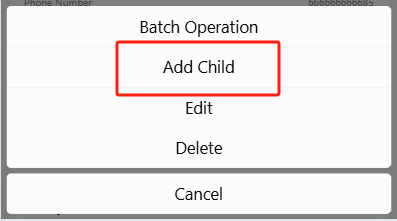
-
Tap 【Add Child】.
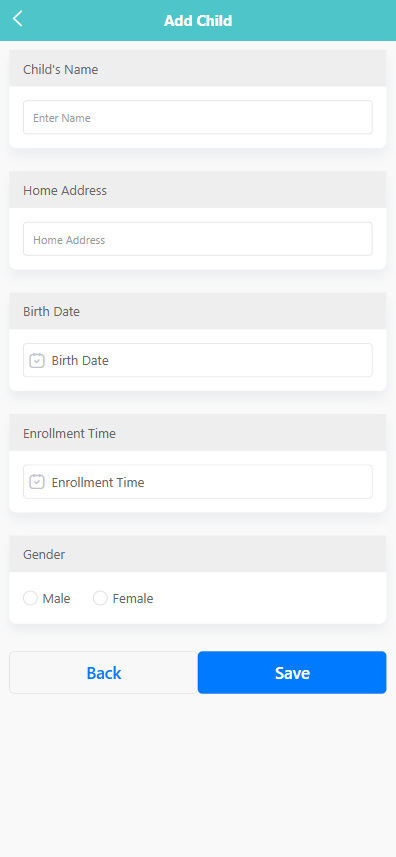
-
Fill out the child’s information:
- Child’s Name
- Home Address
- Birth Date
- Enrollment Time
- Gender
-
Click 【Save】 to link the child to the parent.
🖊️ Editing Parent Information
To update a parent profile:
-
Long press the parent’s record.
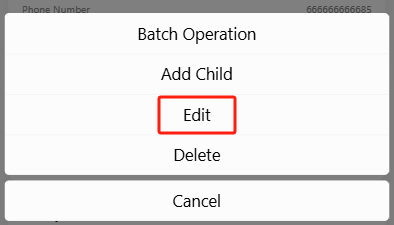
-
Select 【Edit】 from the menu.
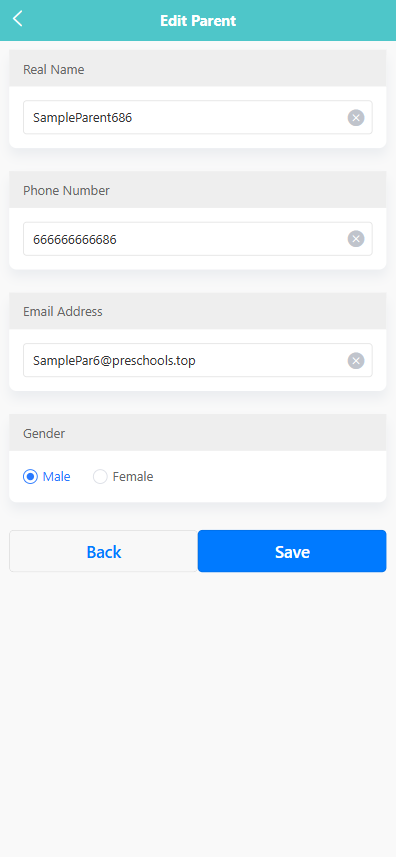
-
Modify the fields as needed, then click 【Save】.
🗑️ Deleting a Parent
To delete a parent account:
-
Long press the parent entry.

-
Tap 【Delete】 from the menu.
-
A system prompt will appear: “Are you sure you want to delete?”
-
Click 【OK】 to confirm or 【Cancel】 to exit without changes.
📦 Batch Operation
To manage multiple parents at once:
- Long press any parent record and tap 【Batch Operation】.
- Select the desired entries using the checkboxes.
- Use 【Select All】 to select all items or tap 【Delete】 to remove selected entries in bulk.
Staff Management
The Staff tab allows administrators to manage teacher and staff accounts, assign roles, and record important employment information.
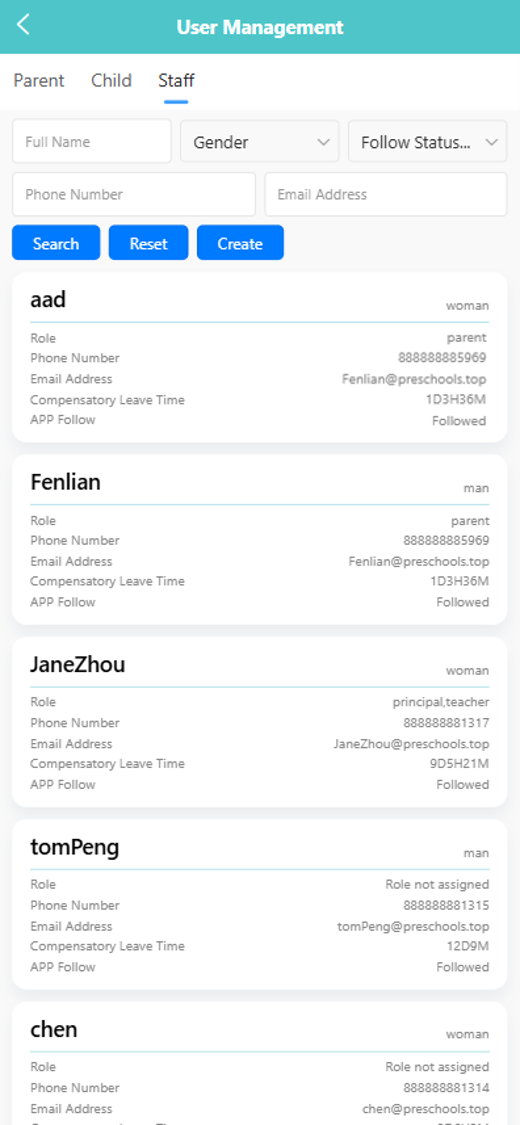
🔍 Searching for Staff
You can filter staff records using the following fields:
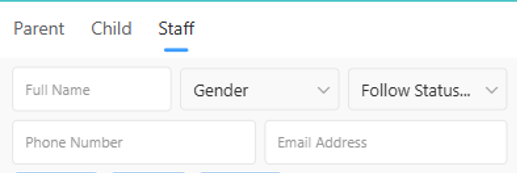
- Full Name
- Gender
- Follow Status
- Phone Number
- Email Address
Click the 【Search】 button to apply filters. Use 【Reset】 to clear all fields.
➕ Creating a New Staff Member
-
Click the 【Create】 button.
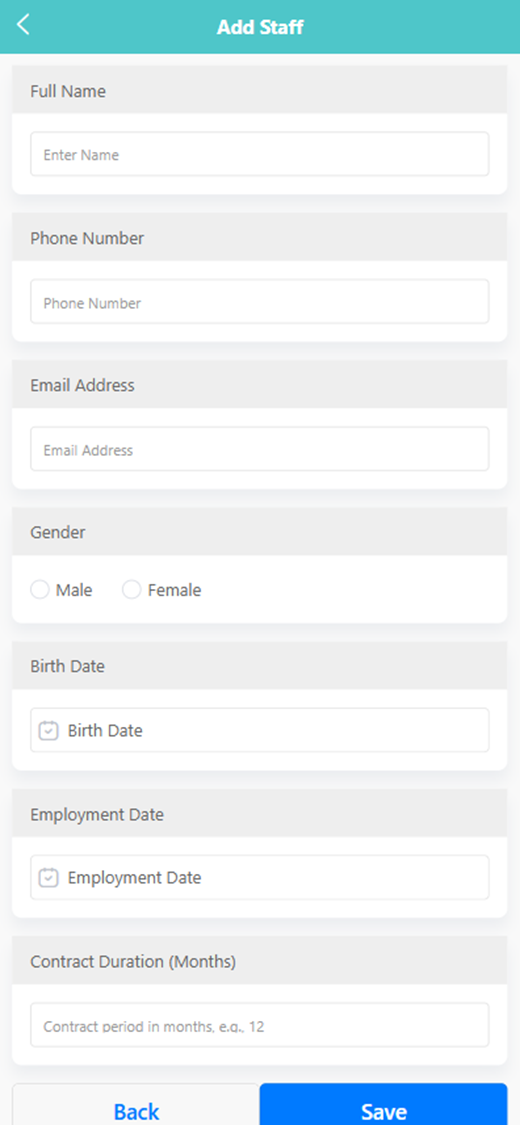
-
Complete the form with:
- Full Name
- Phone Number
- Email Address
- Gender
- Birth Date
- Employment Date
- Contract Duration (Months)
-
Click 【Save】 to add the staff member or 【Back】 to cancel.
🖊️ Editing Staff Information
To update staff information:
-
Long press a staff entry.
-
Select 【Edit】 from the pop-up menu.
-
Modify any fields and click 【Save】.
🗑️ Deleting a Staff Record
To delete a staff member:
-
Long press the staff card.
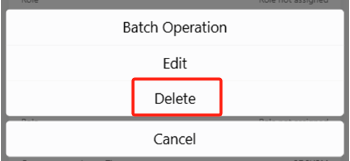
-
Tap 【Delete】 from the pop-up menu.
-
A system prompt will appear: “Are you sure you want to delete?”
-
Click 【OK】 to confirm or 【Cancel】 to abort.
👥 Assigning Roles
To assign or update a staff member's role:
-
click a staff card to assign or update a staff's role.
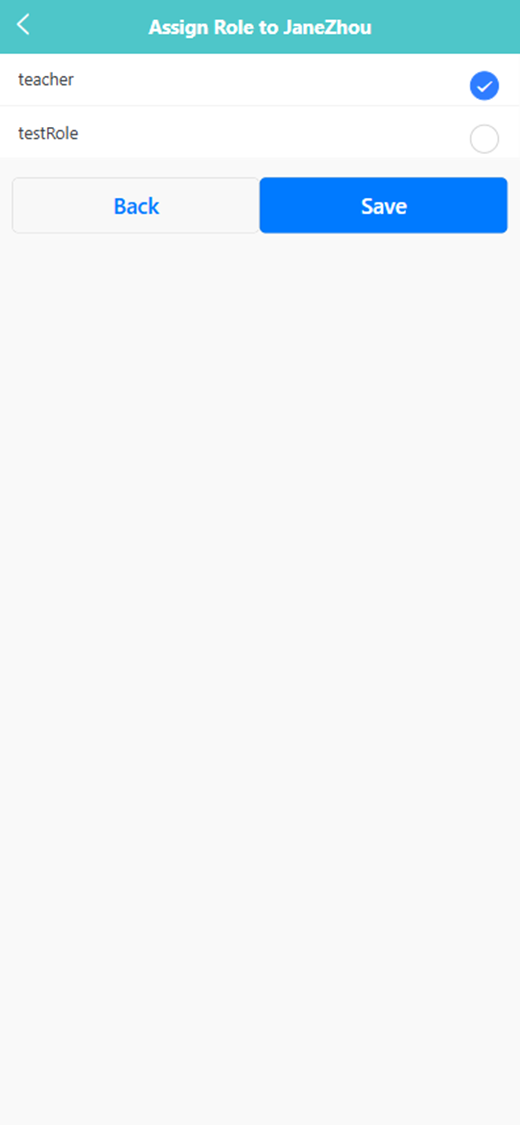
-
Select a role from the list (e.g., teacher, principal).
-
Click 【Save】 to confirm the role assignment.
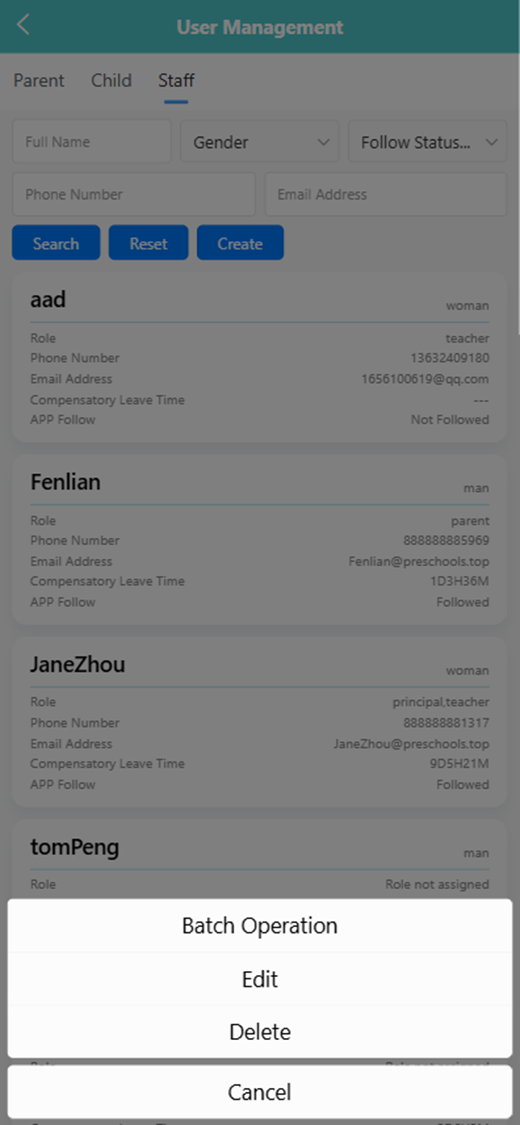
📦 Batch Operation
To manage multiple staff records:
-
Long press any staff entry and select 【Batch Operation】.
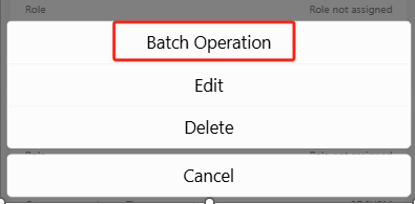
-
Use the checkboxes to select staff members.
-
Click 【Delete】 to remove selected users.
-
You may also use 【Select All】 to choose all staff at once.